

Sultana
 Sultana
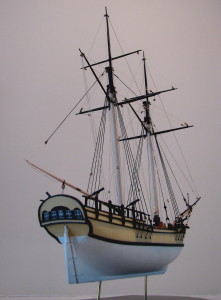
The Sultana is a colonial schooner. The Ben Lankford plans indicate that Sultana was built in 1767 in Boston “as a pleasure boat and small trader,” and was also used as a dispatch carrier. Historian Howard Chapelle states that it was purchased in 1768 by the British. He refers to Sultana as a ‘tiny’ example of a seagoing trader, having a deck length of approximately 50′ and a breadth of 16′.
During the Revolutionary War, a schooner could be used for many purposes. Lightly armed, it might be used as a smuggler, to capture small trading vessels, or to carry troops, supplies for the troops, or dispatches. Schooners also could be armed with small cannon and then be used to capture enemy trading vessels, protect friendly ports and vessels, or engage enemy armed vessels.
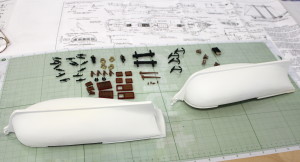
I typically build plank-on-bulwark or plank-on-frame models. This is my first solid hull model. It’s quicker, but less satisfying to build. I will build two simultaneously and keep one model to join my collection.
January 17, 2014
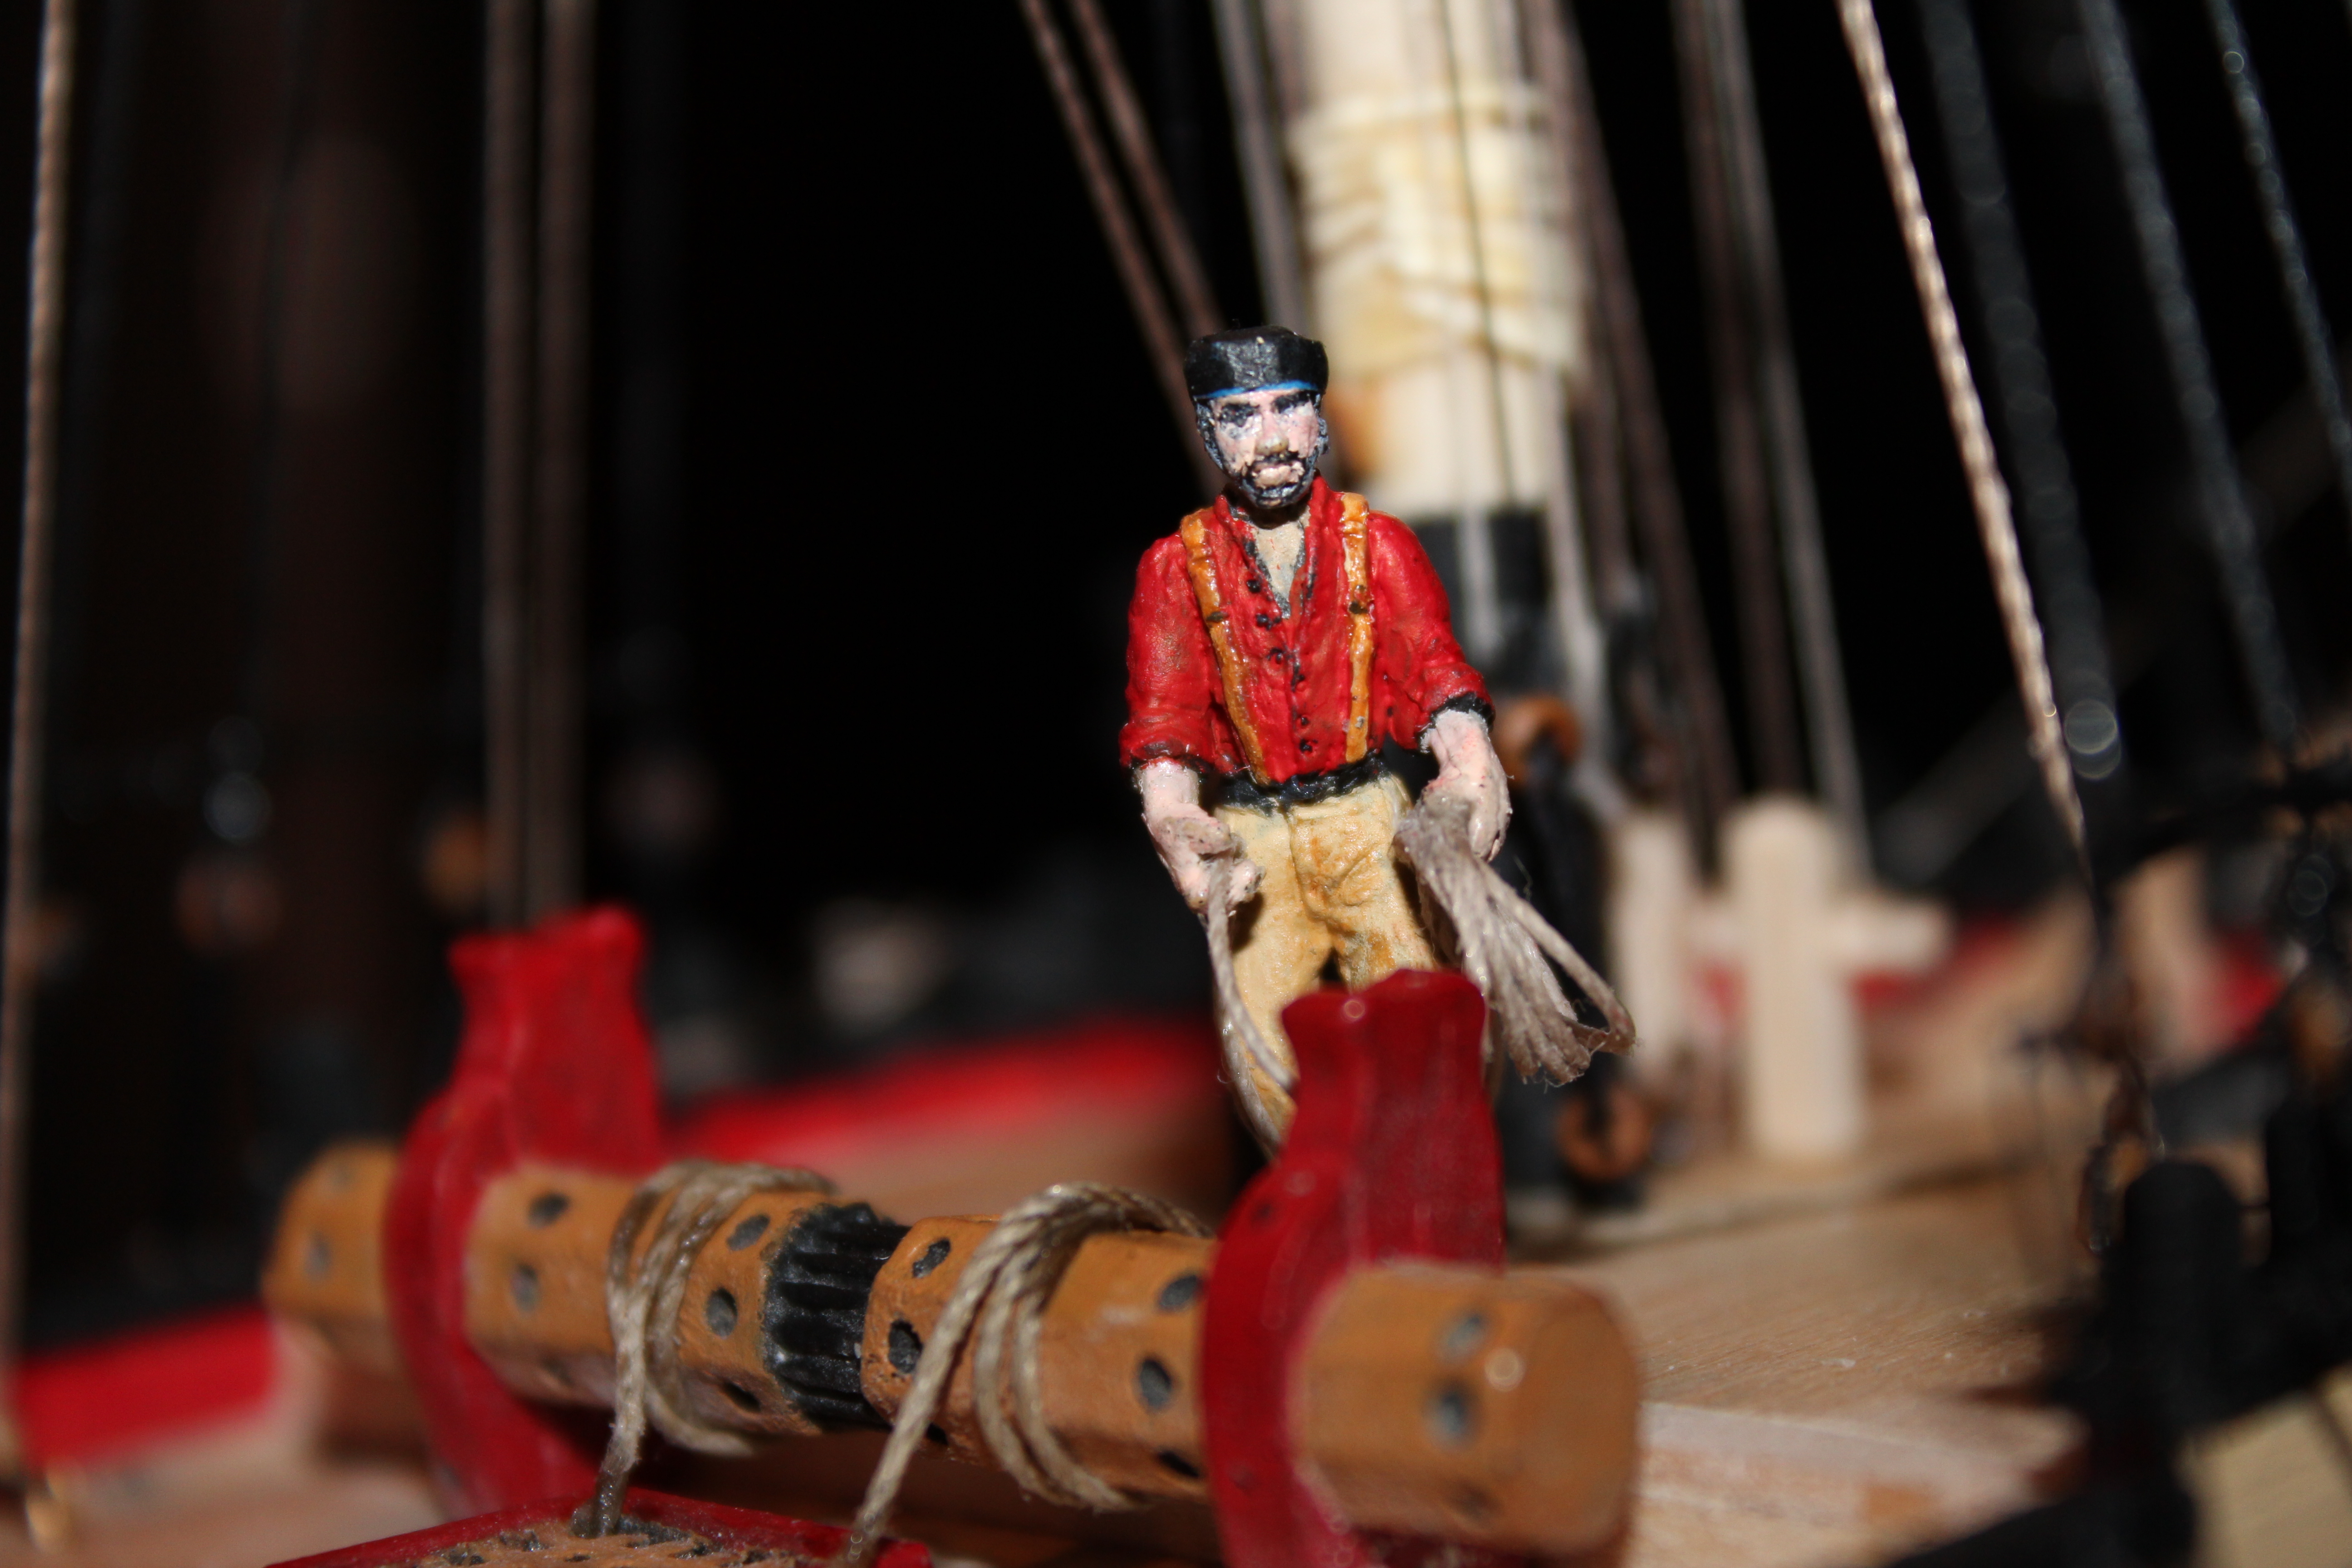 I have added two crew to the Sultana; each is a little more than 1″ tall. Stuart and his ‘captain’ are metal figurines of road workers that I had to modify significantly to transform them into Colonial period sailors. This took some inventiveness. For example, Stuart’s cap was made from three pieces of masking tape, fitted and glued to his head, then painted black. As with everything else on the Sultana, the figures were extensively researched, then adjusted to the scale of the model. Take the buttons on Stuart’s shirt: officers on Colonial period ships would have worn brass buttons, but common sailors like Stuart made their buttons out of bone. Alternatively, a farm boy just joining the ship might have made his buttons out of wood. However, when I painted the buttons bone-white, they just looked silly, while brown buttons disappeared into the red color of Stuart’s shirt. As a result, Stuart ended up with black buttons, which is based on nothing other than scale and aesthetics.
Incidentally, I added rope coils where the lines are belayed to the ship, an important feature that is not shown in these pictures. They make the model look less tidy, but Sultana would not be a realistic ‘to scale’ model without them.
January 15, 2014
It’s hard to resist making improvements to a finished model when it’s sitting on your work bench. I decided to add the main yards, which then required additional running rigging, which then led to some more rigging that I thought would improve the look.
That means it’s time for the name plate. Call it superstitious, but I never order the name plate until the model is completed to my satisfaction. The good news is, the plate’s been ordered!
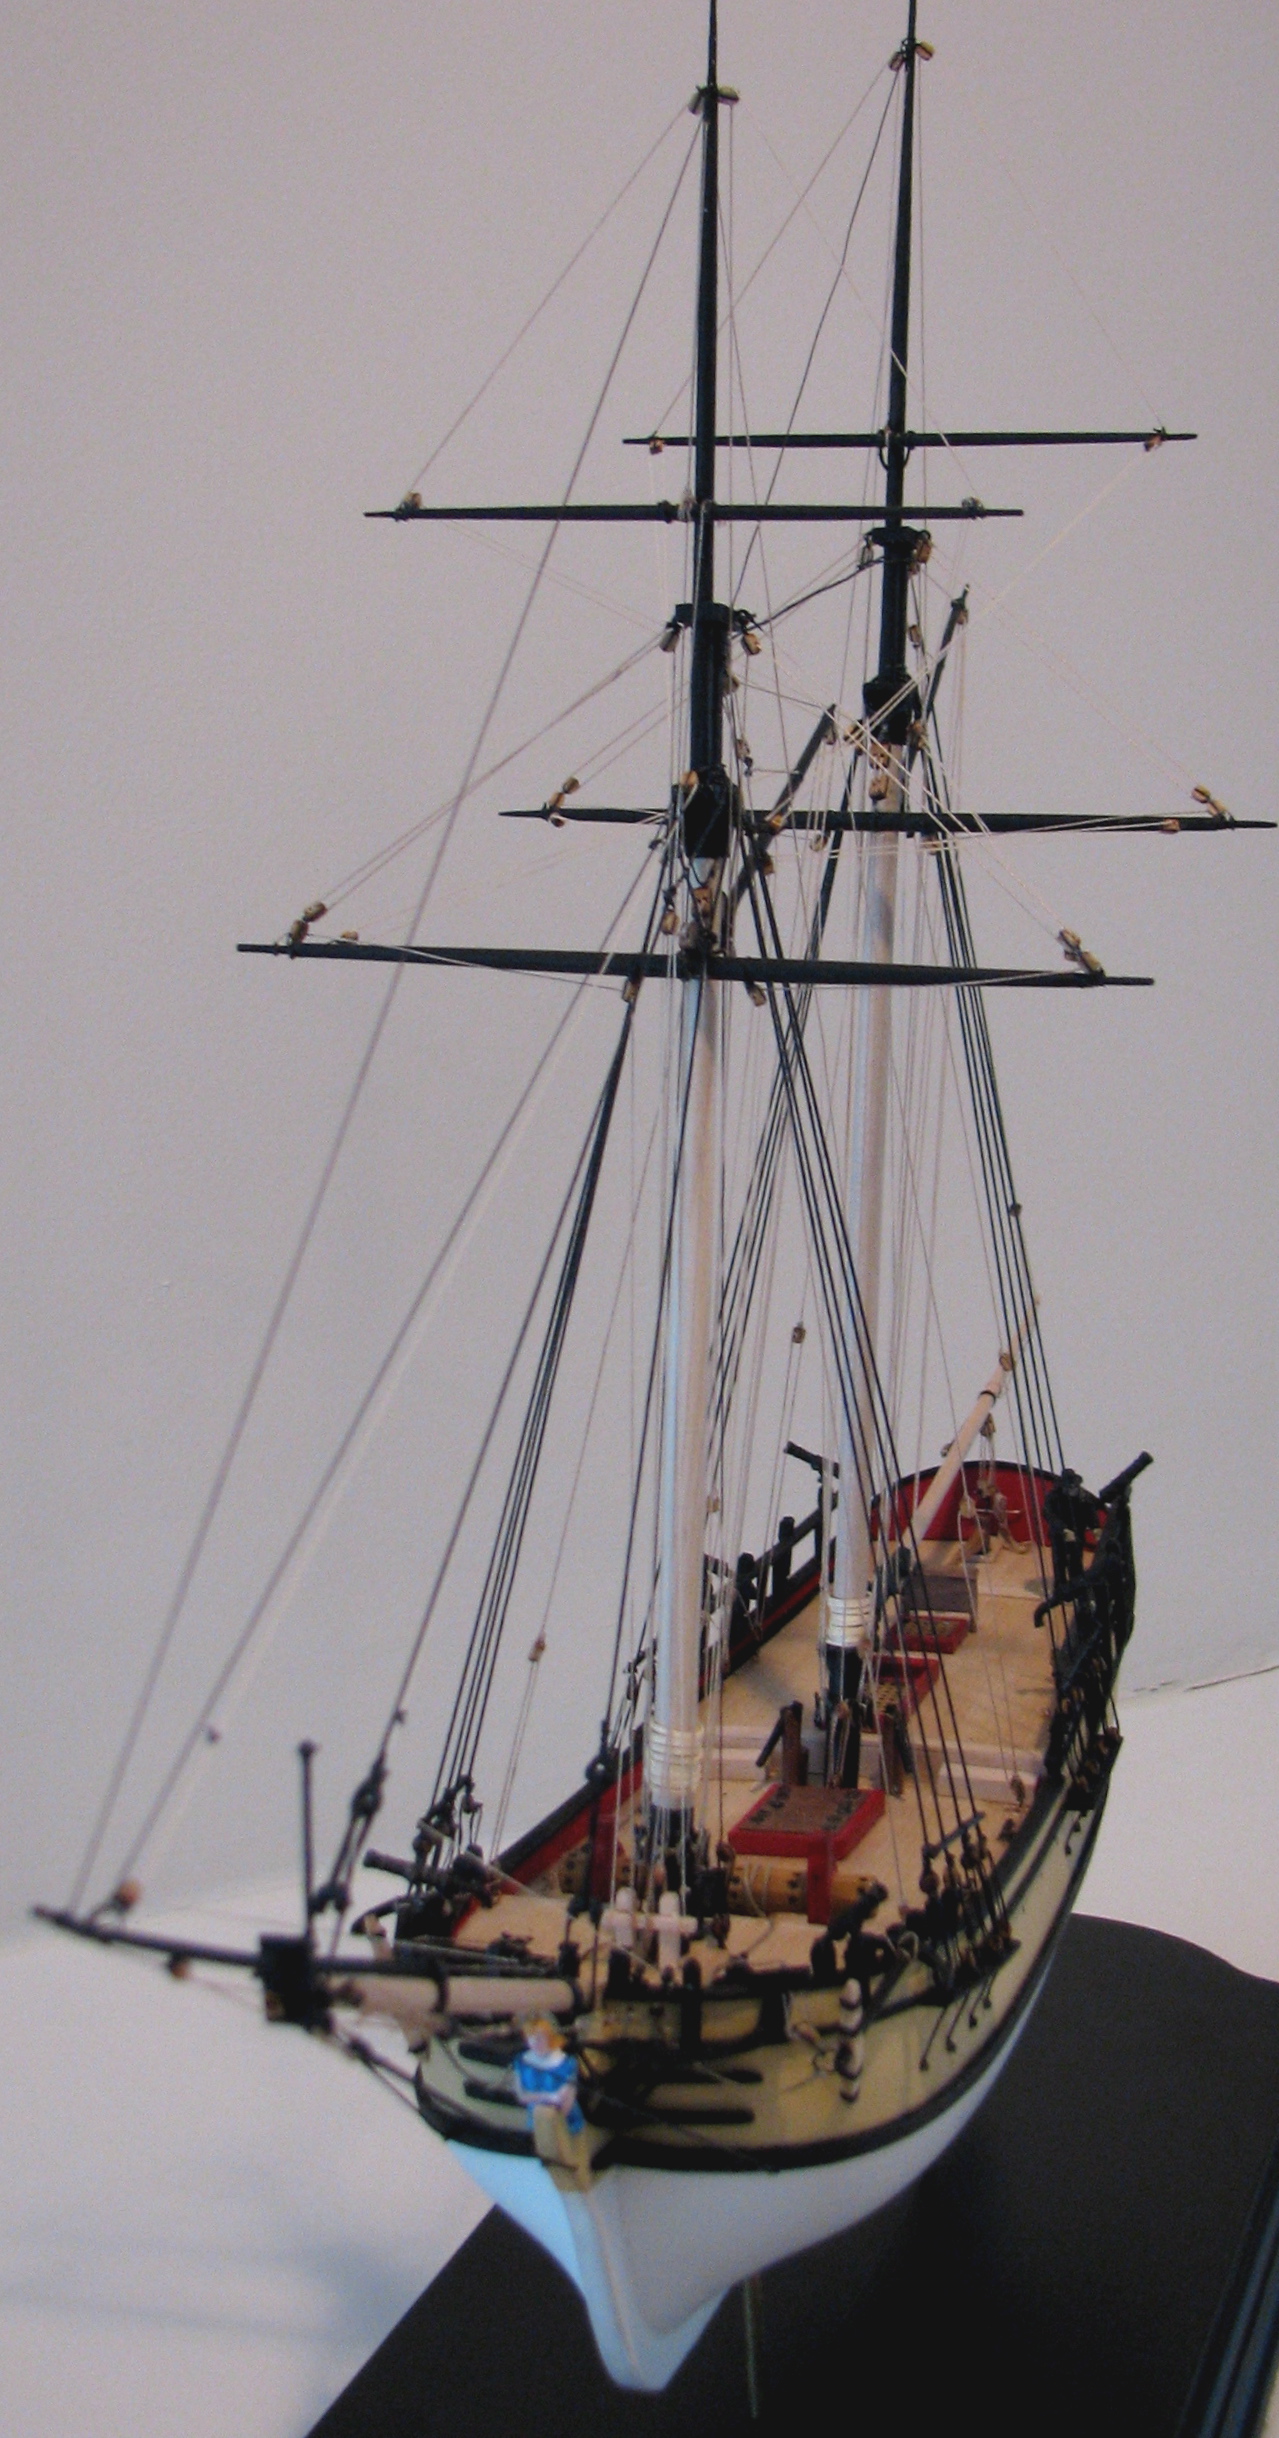

Now, if we can only get Stuart to come on board…
December 30, 2013
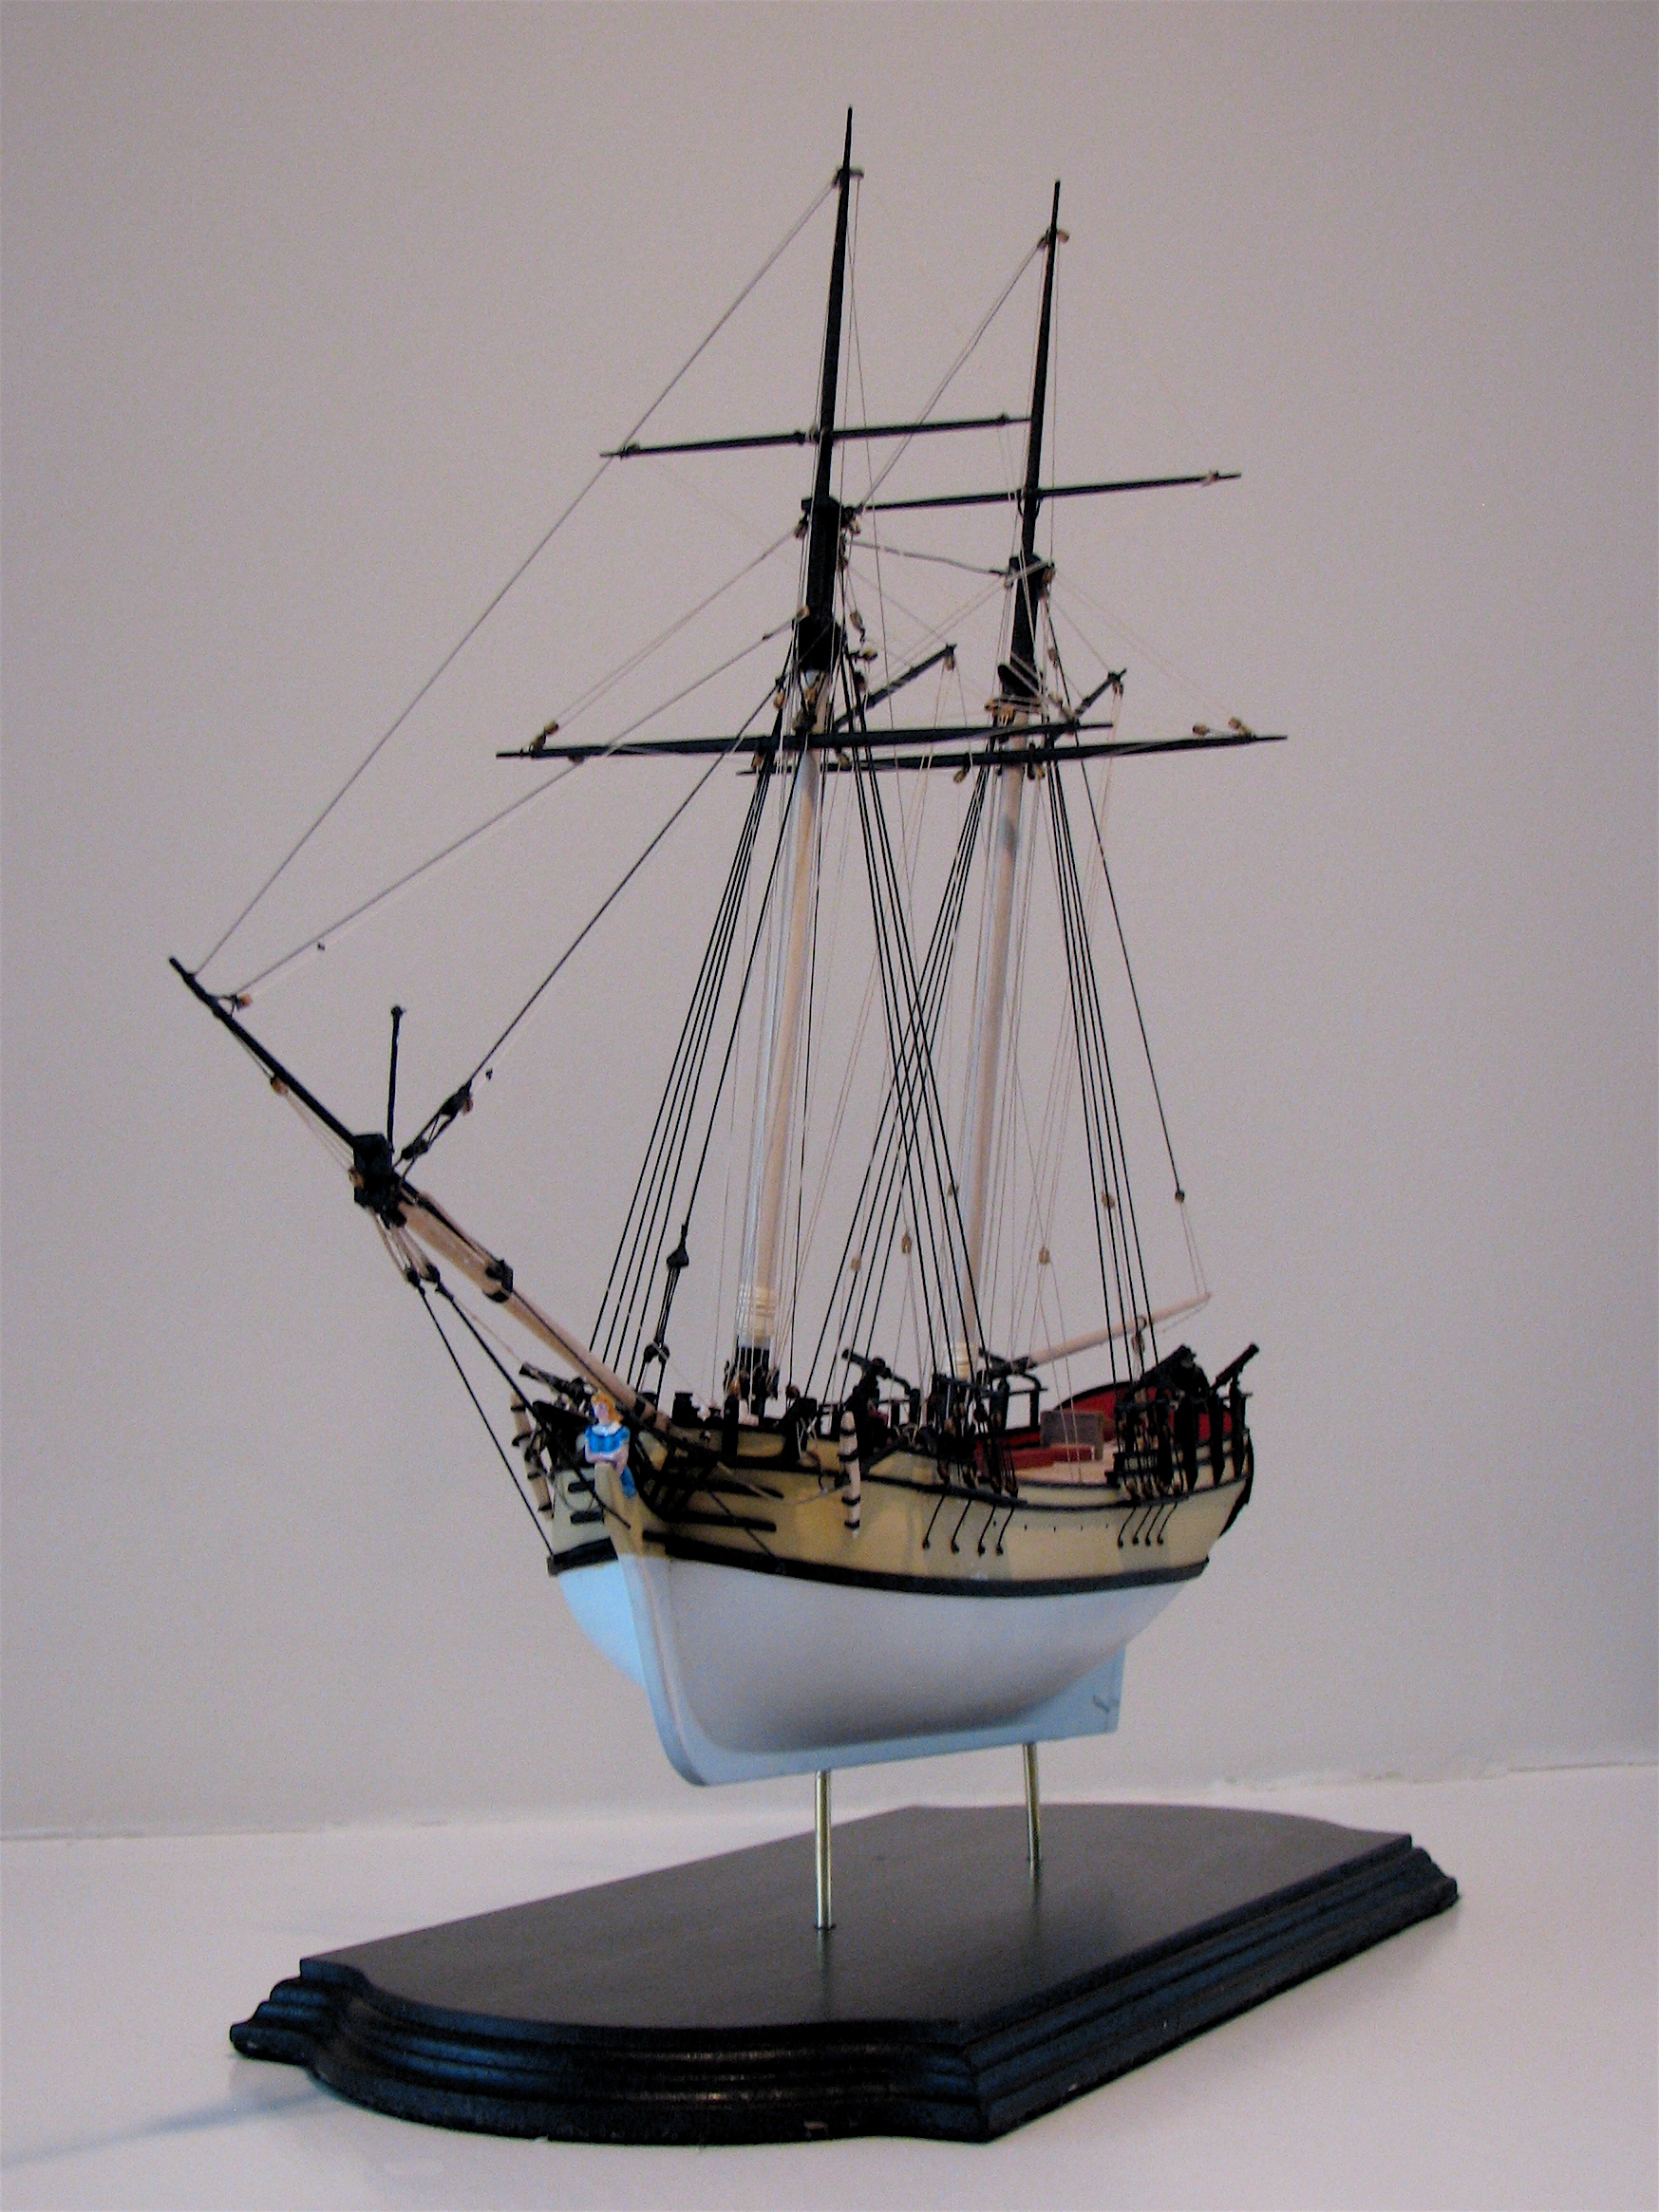
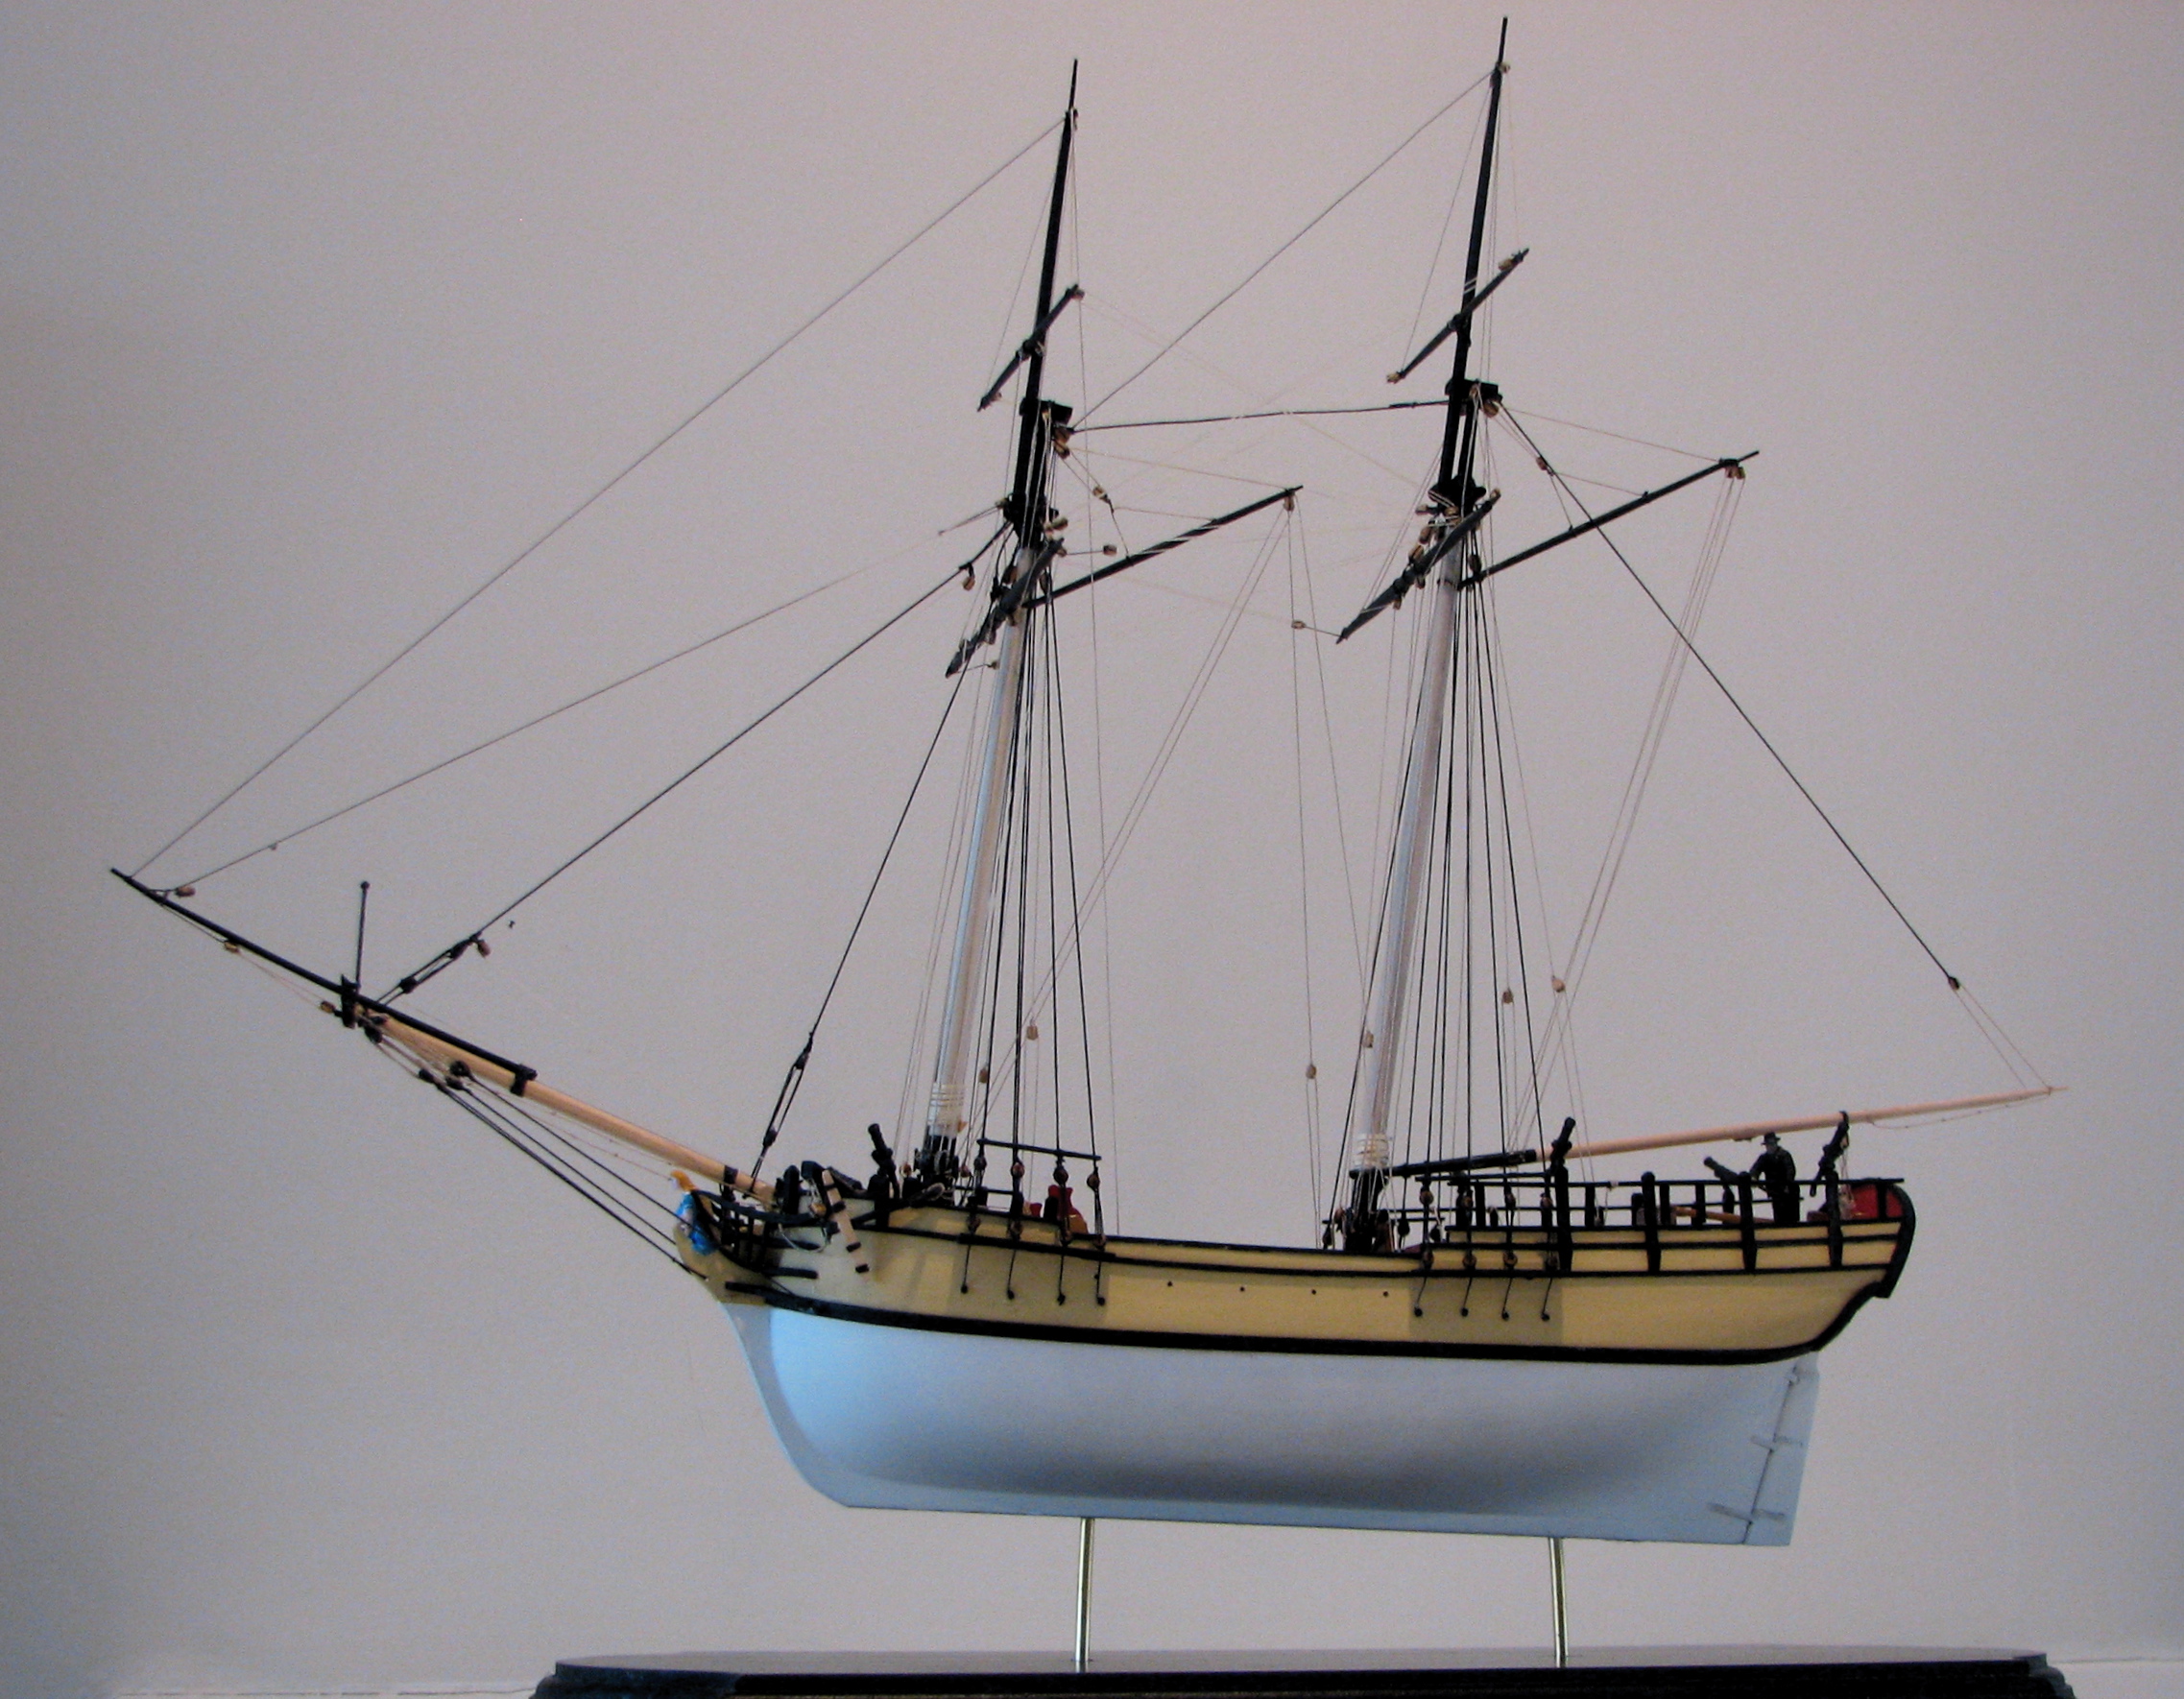
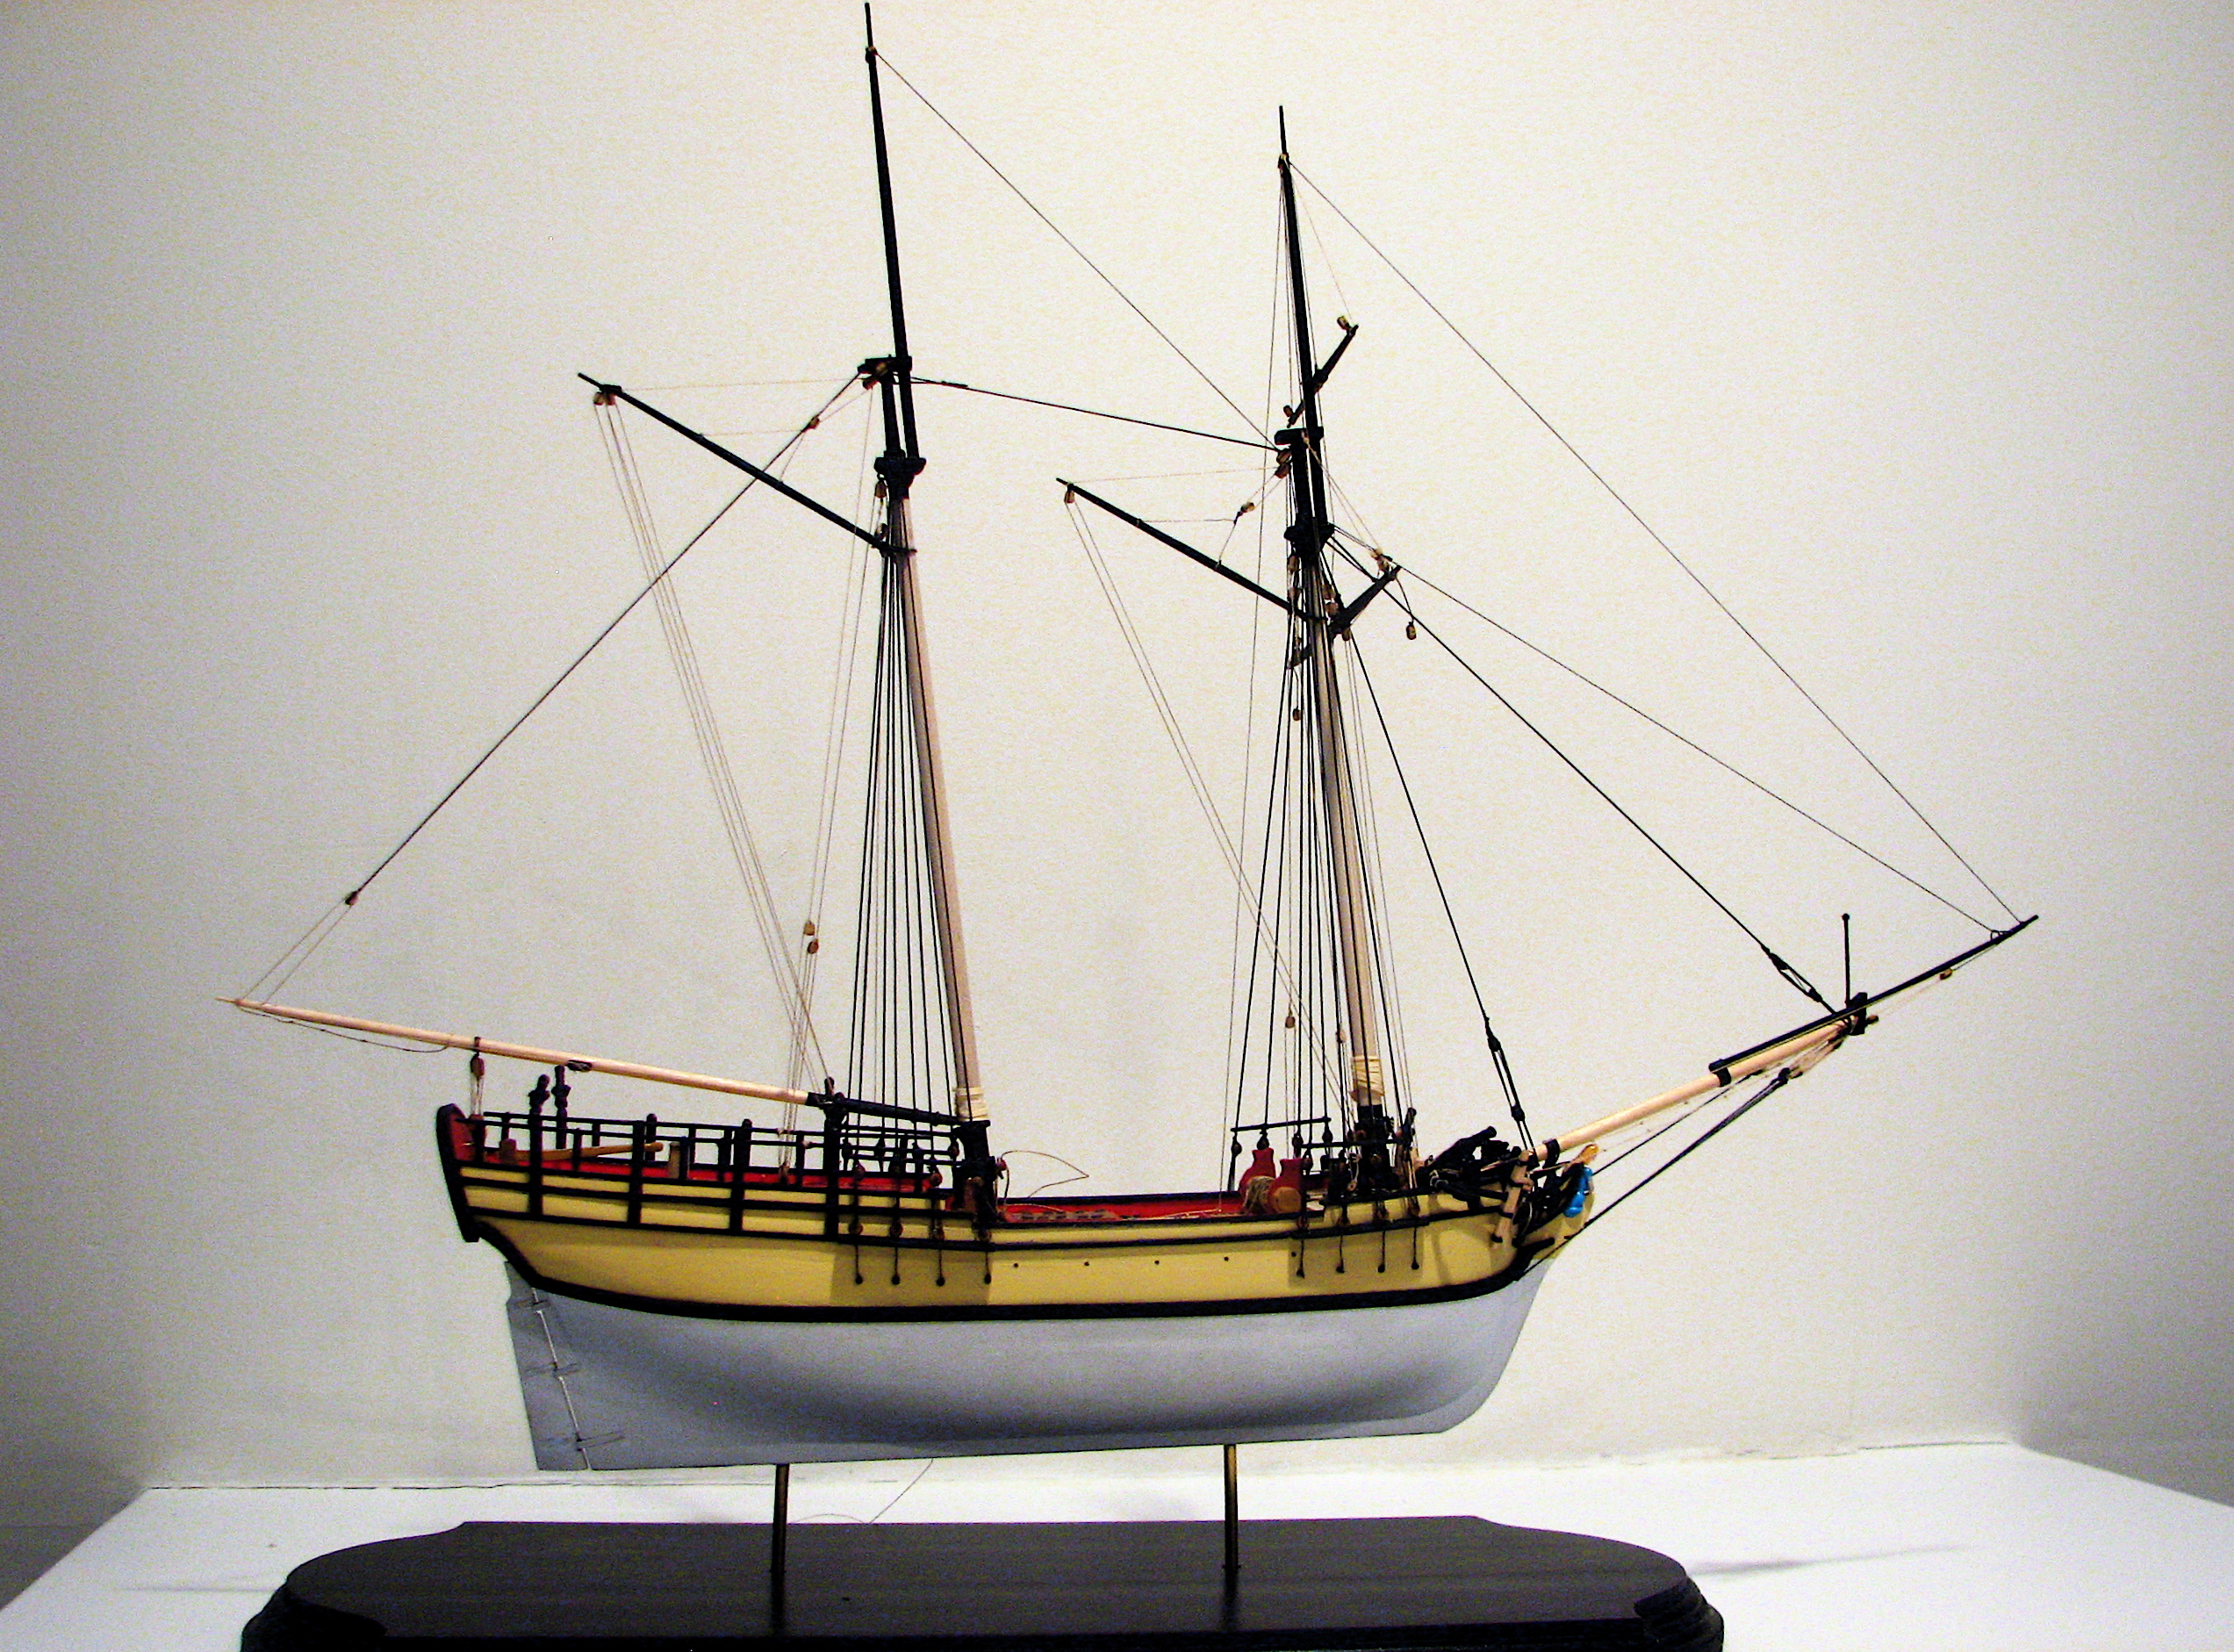 At this stage, I might consider the Sultana “finished”. The only things I might add are the main yards (which would have been removed under certain circumstances) and two flags. I will give this some thought, since you can not change your mind after it’s done and I’m not always happy with the way flags look. She is a fine looking model, whose size enhances the attention to detail that I gave her. I love her colors and her lines.
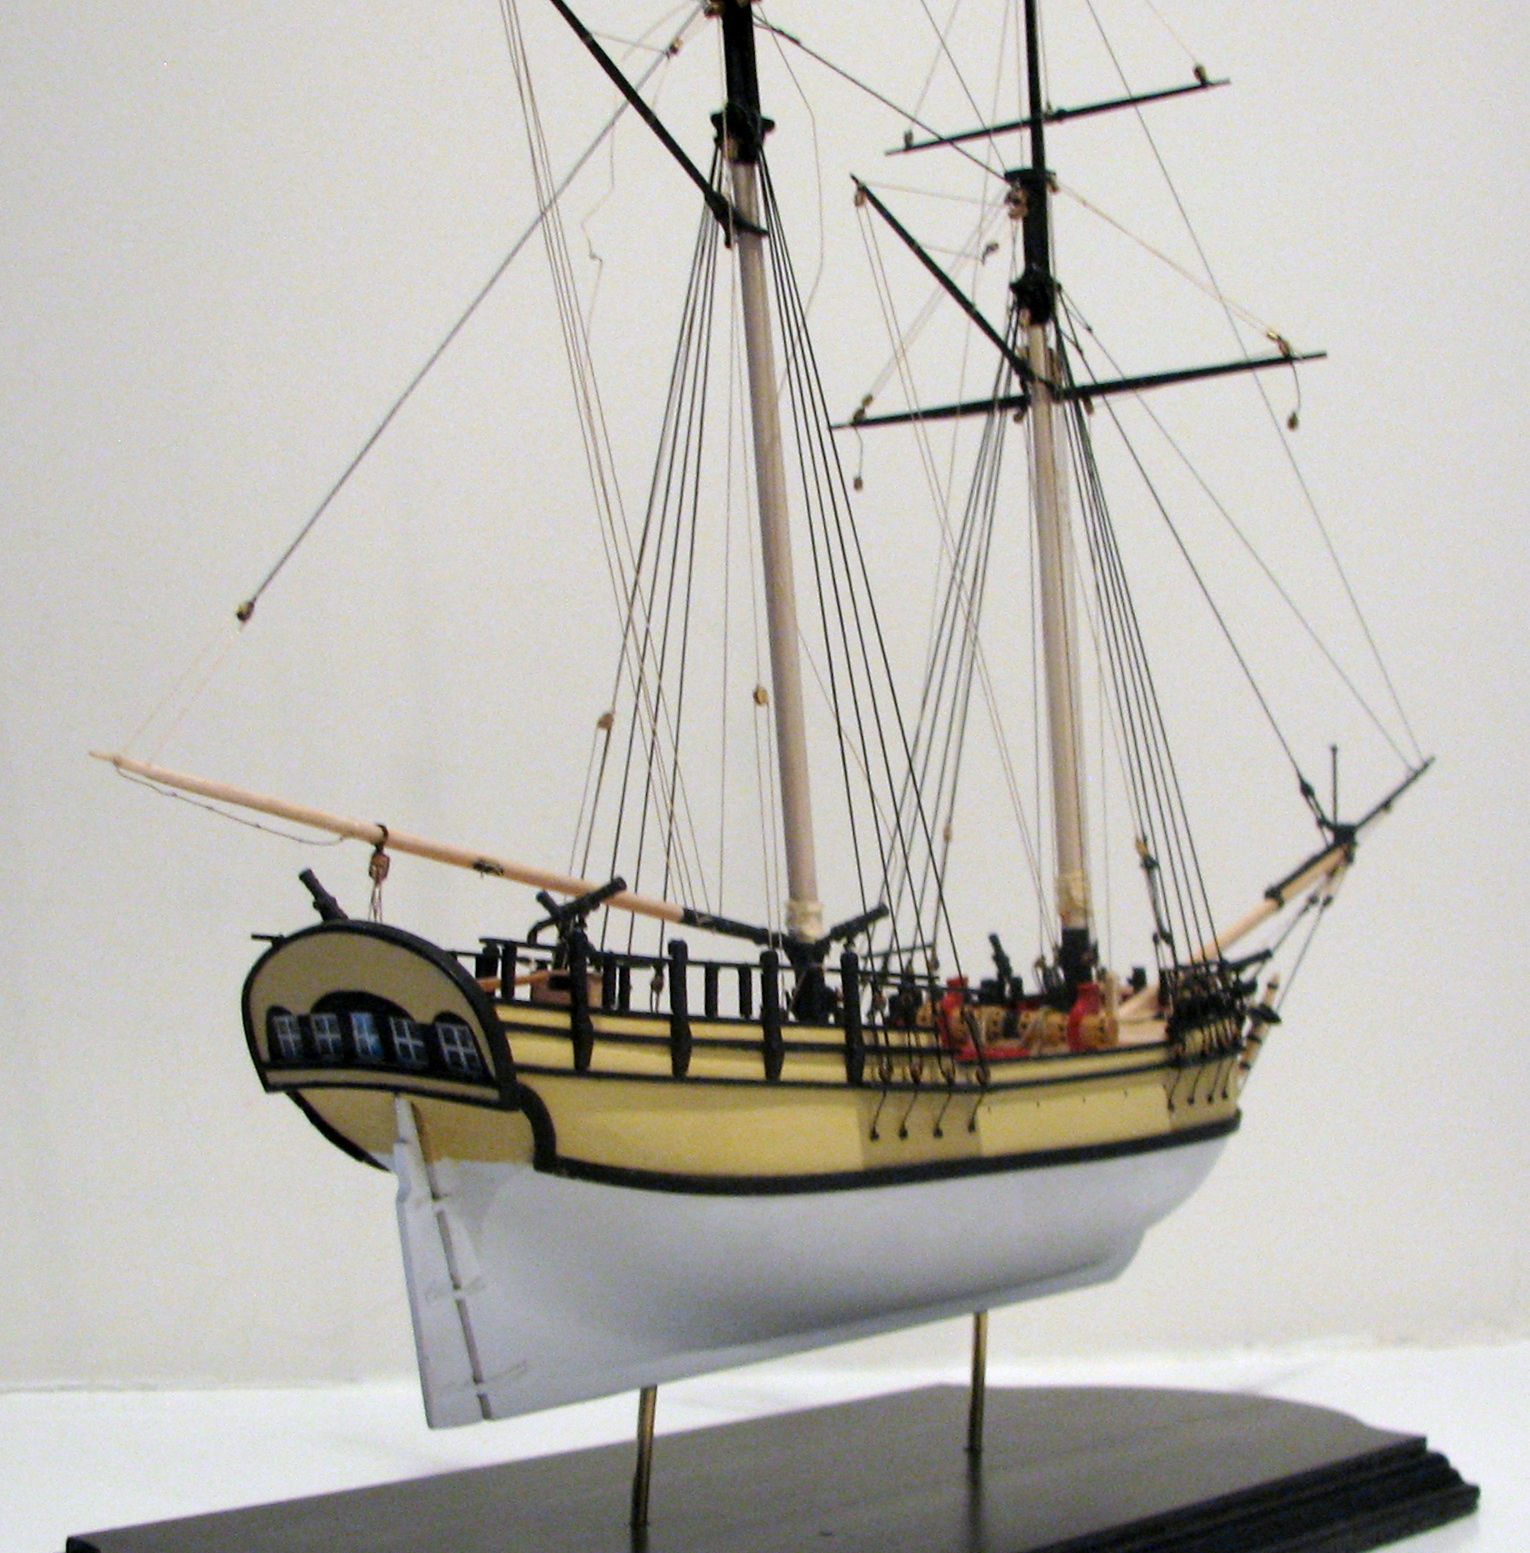 Although she is a schooner, Sultana carried square yards and sails which could quickly be added or removed. Being small, she would not have had some of the deck features or rigging features one would find on a larger vessel. For example, instead of a capstan, she would have used a windlass to raise the anchors. Her boat would have been tied behind her, rather than carried on her deck. My model of Sultana also does not have ratlines, which I did not find in several contemporary drawings of sloops. As a result, anybody having to get to the crosstrees would have had to have been raised in a cradle, a trick my friends and I have used on a modern sloop.
December 11, 2013
 Almost done. The rudder has been attached, the ship has been put on its stand, the masts have been painted and stepped, and the bowsprit is rigged.
I created a stand that is similar to the ones on ships models at the Smithsonian’s Museum of American History. The super simple lines are in keeping with the look and feel of the model. Each brass pillar is a tube that is placed inside another tube, thus creating the ‘floating on air’ look. It took a while longer, but the result is worth it. I also glued a felt coating to the bottom.
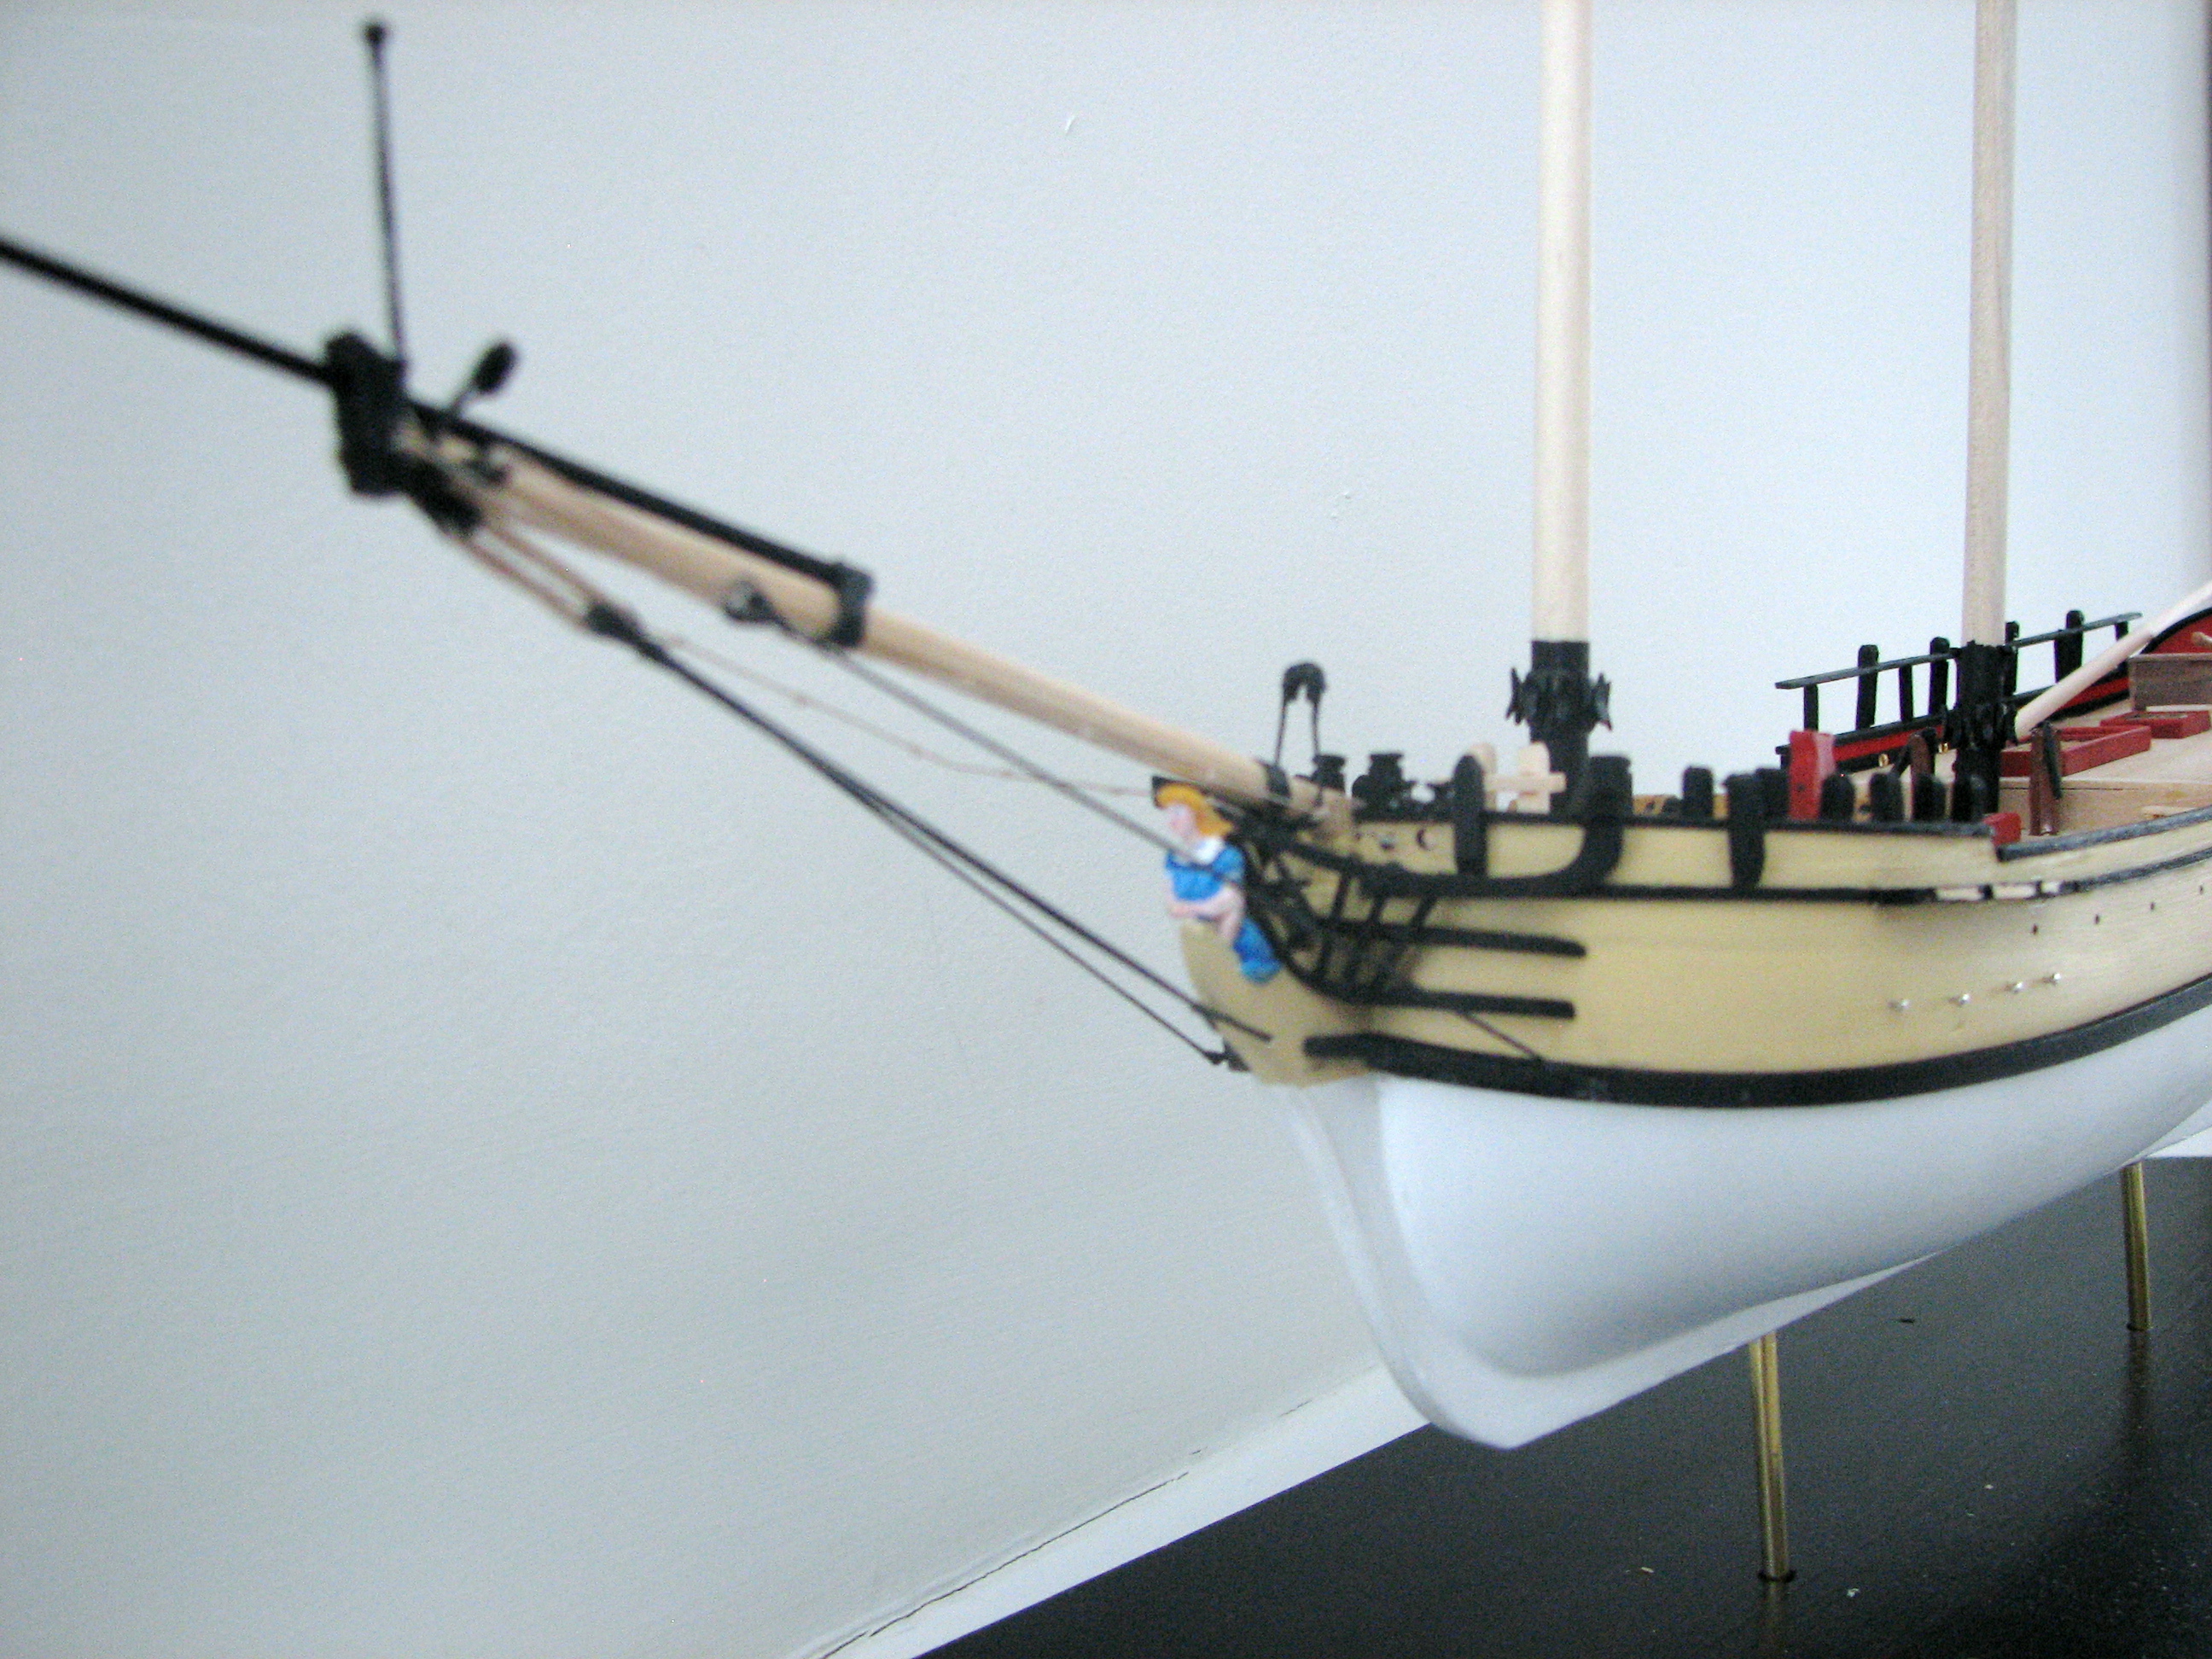 The bowsprit rigging is always a challenge for me, since I want to show detail but I don’t want it to look cluttered. This requires that everything be made exactly to scale. For example, the flag staff had to be super thin. I searched the house for something made of wood (bless my wife, she is so patient) but I finally settled on a sewing needle, cut at both ends. The staff cap is a thin piece of thread wrapped around the top with super glue. Once trimmed and painted, it looks exactly as it should.
I made one mistake I will never make again. I stepped the masts before attaching all the cleats, eyebolts, and boom step. I succeeded in getting it all right, but it was so much more difficult than it needed to be.
The yards are complete and ready to be rigged. The deadeyes and shrouds are mostly assembled and ready to be attached. Other than some touch ups, the painting is finished, as well. Assuming that I keep it simple (something I tend not to do well), the Sultana is just a few days away from being finished.
November 22, 2013
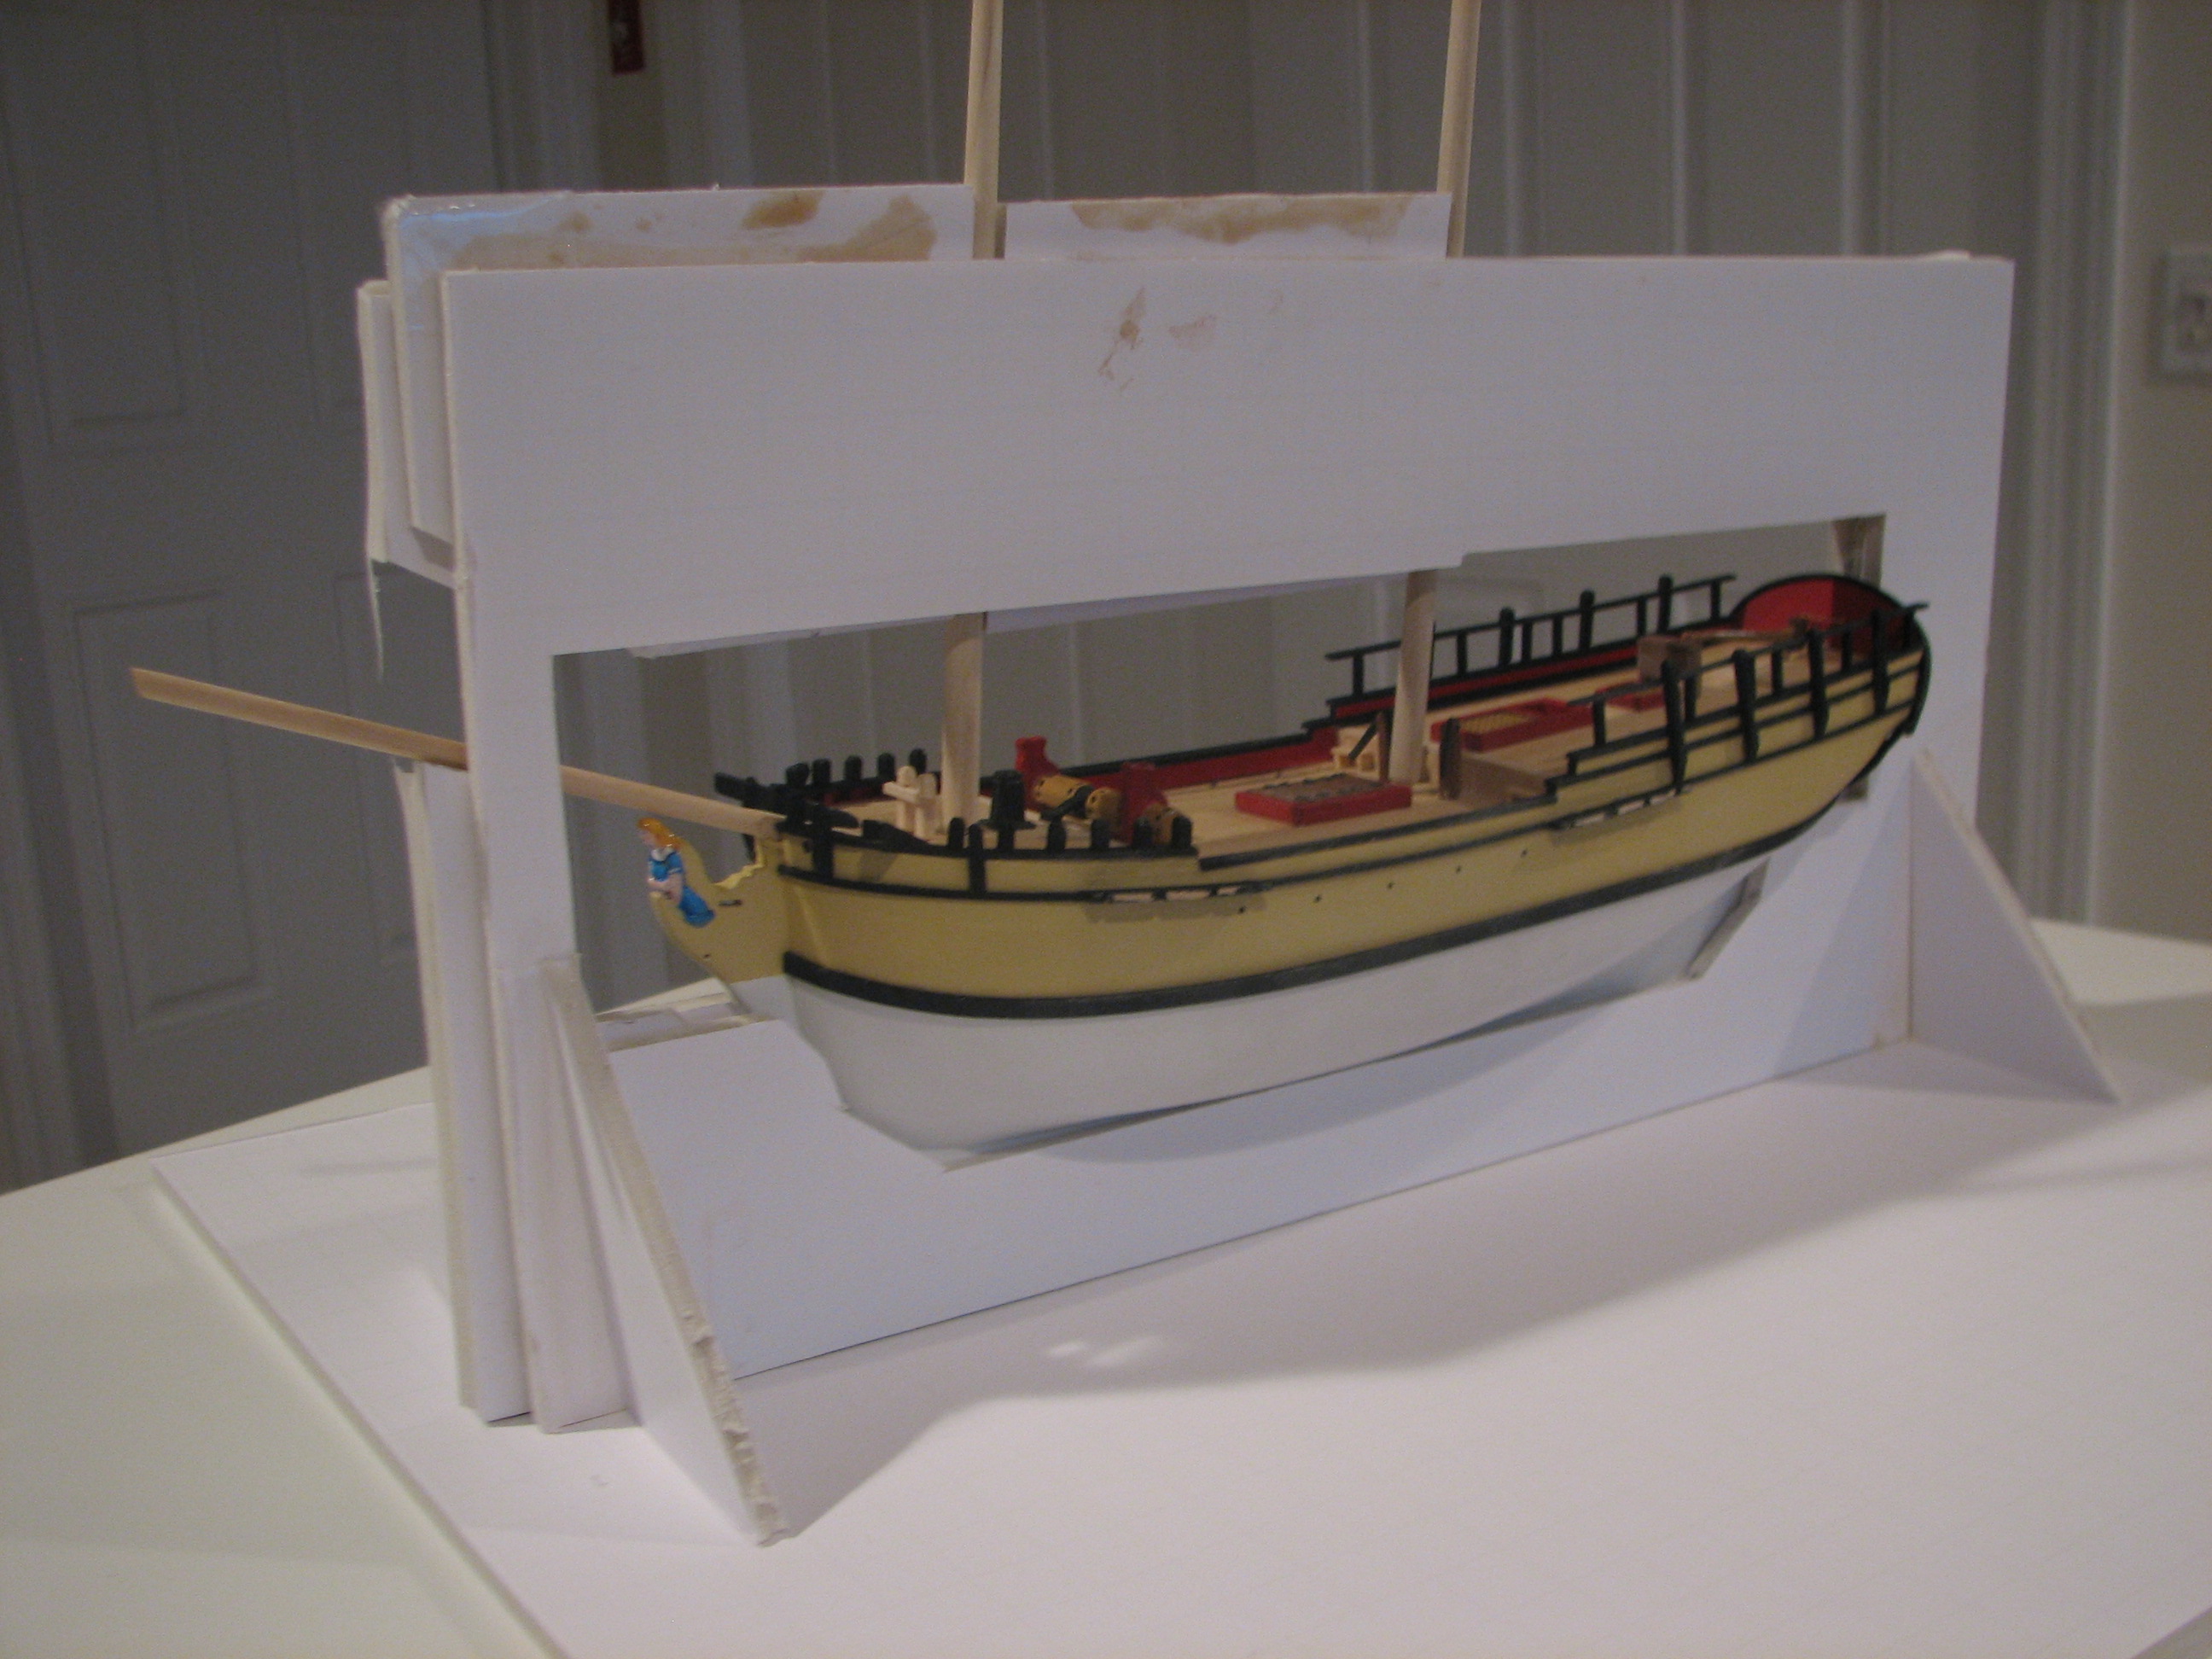
I have finished adding all the rails, the gun mounts, and the deck fittings. I am now shaping and placing the masts. It is critical that everything be aligned properly, which is difficult to do without a jig. The jig that I devised (left) had to be designed for this particular model based on its size. I would have needed something sturdier and more complex if the model had been any bigger. I will finish the masts tomorrow, take a short break for Thanksgiving, then complete the final stage, which is the rigging. I am aiming to finish the model by the first week in December. That’s a few weeks longer than I expected, but it’s paid off in terms of the quality.
November 14, 2013
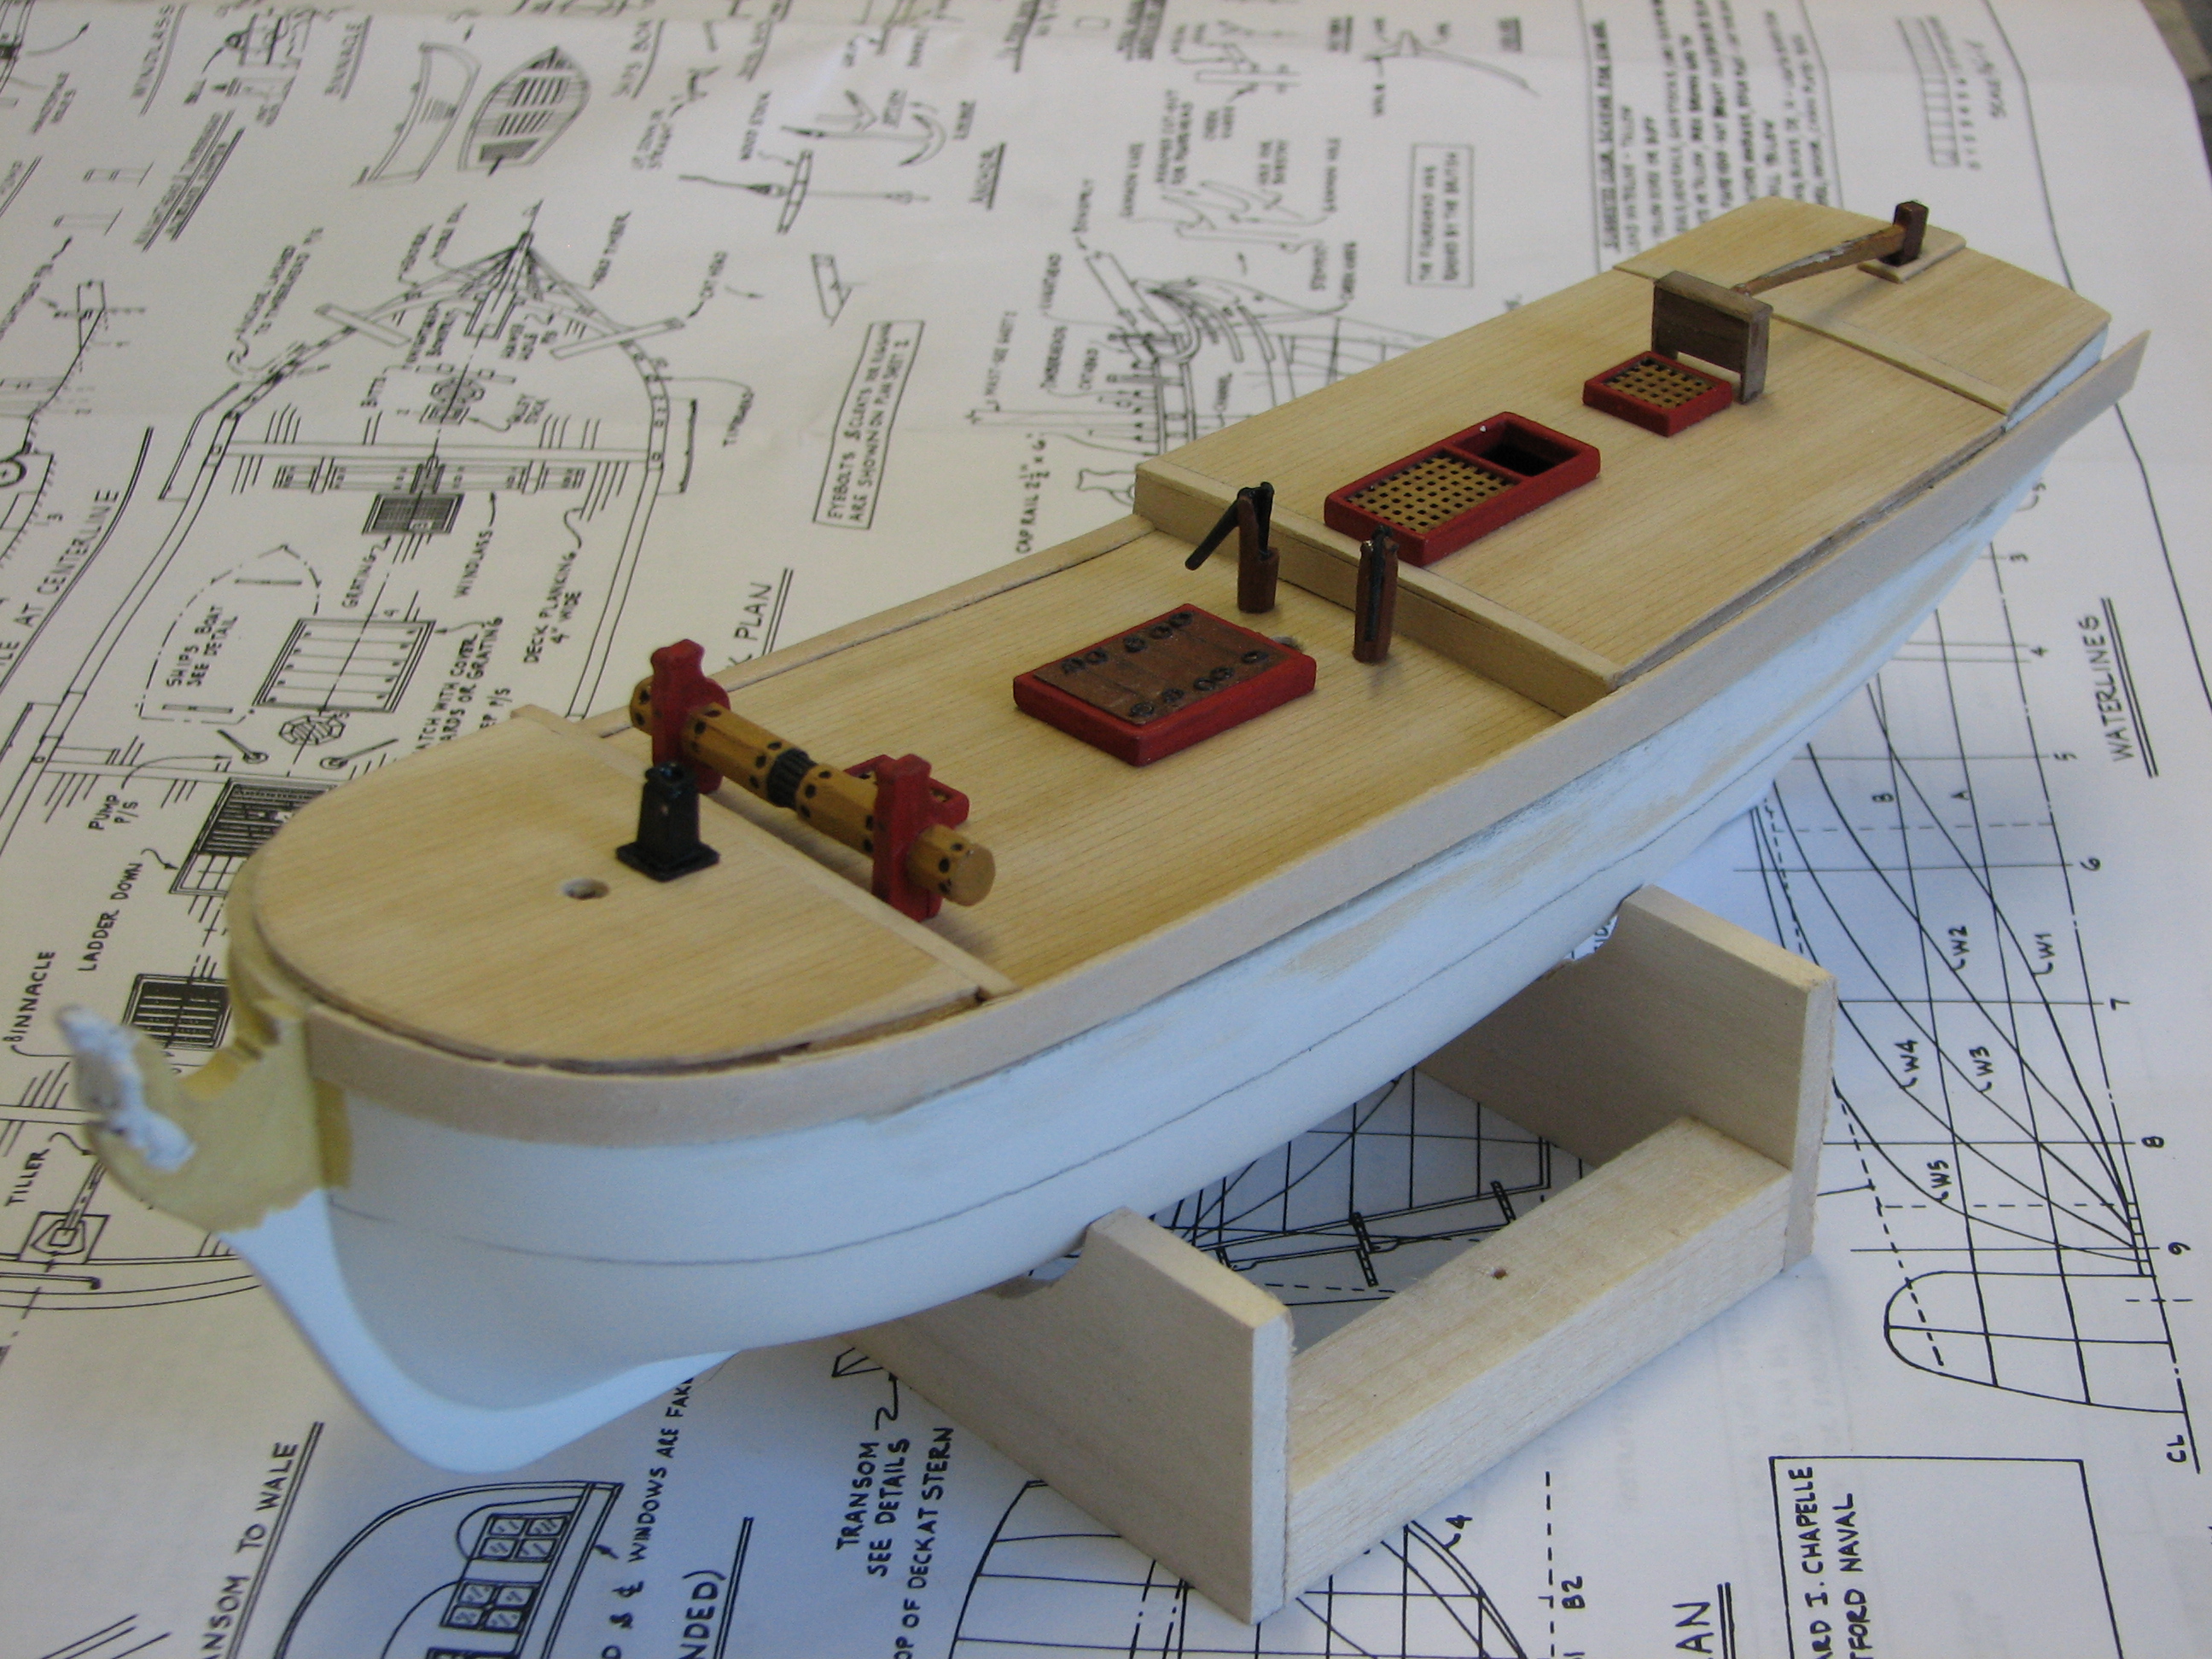
The wale, which is a thick plank that runs the length of the ship, has been added. With the addition of the wale, the hull is more clearly defined. I could stop now, and this would be a charming model. But instead we are now getting to the really interesting part, which involves the masts and rigging. In a few weeks, this hull will be transformed into a beautiful ship.
November 12, 2013
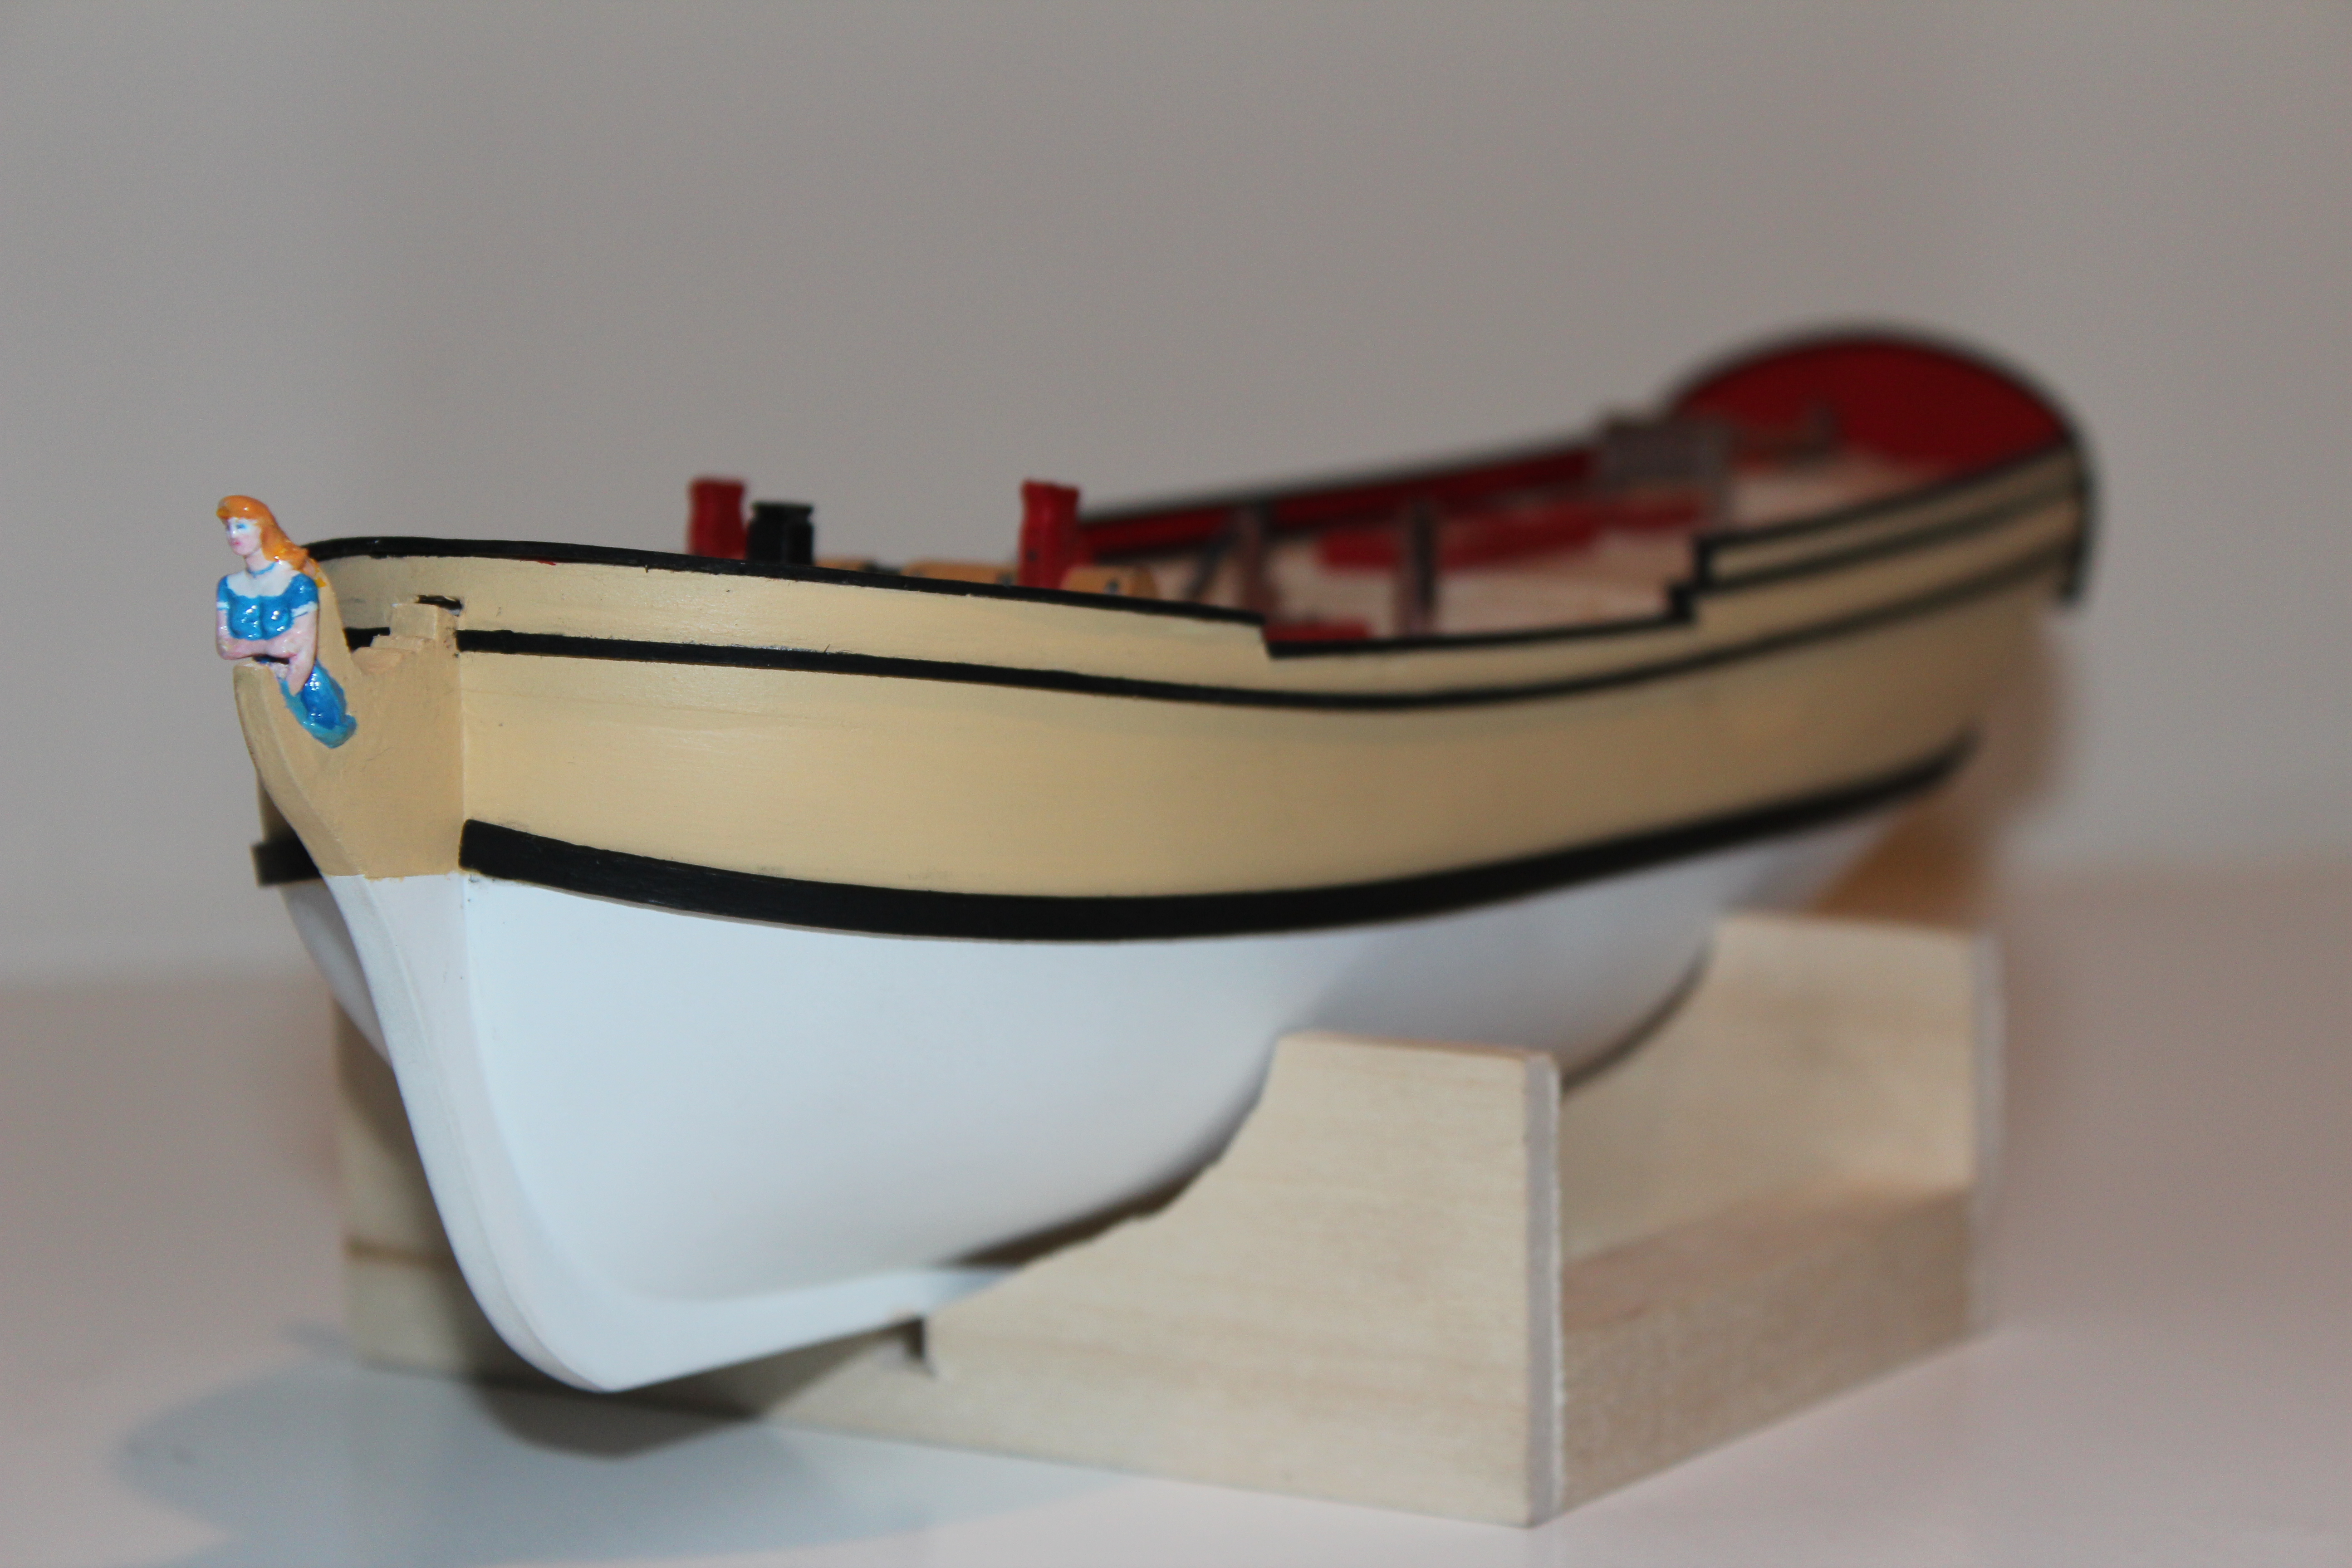
The plans for Sultana’s figurehead call for a half naked lady. That surprised me, since a typical ship of the Colonial or Revolutionary War period would have been built and owned by people who were deeply rooted in the Puritan ethic. To me, that means the Sultana figurehead was probably clothed. Here are some 19th century examples of what I think would have been more typical of an 18th century figurehead:
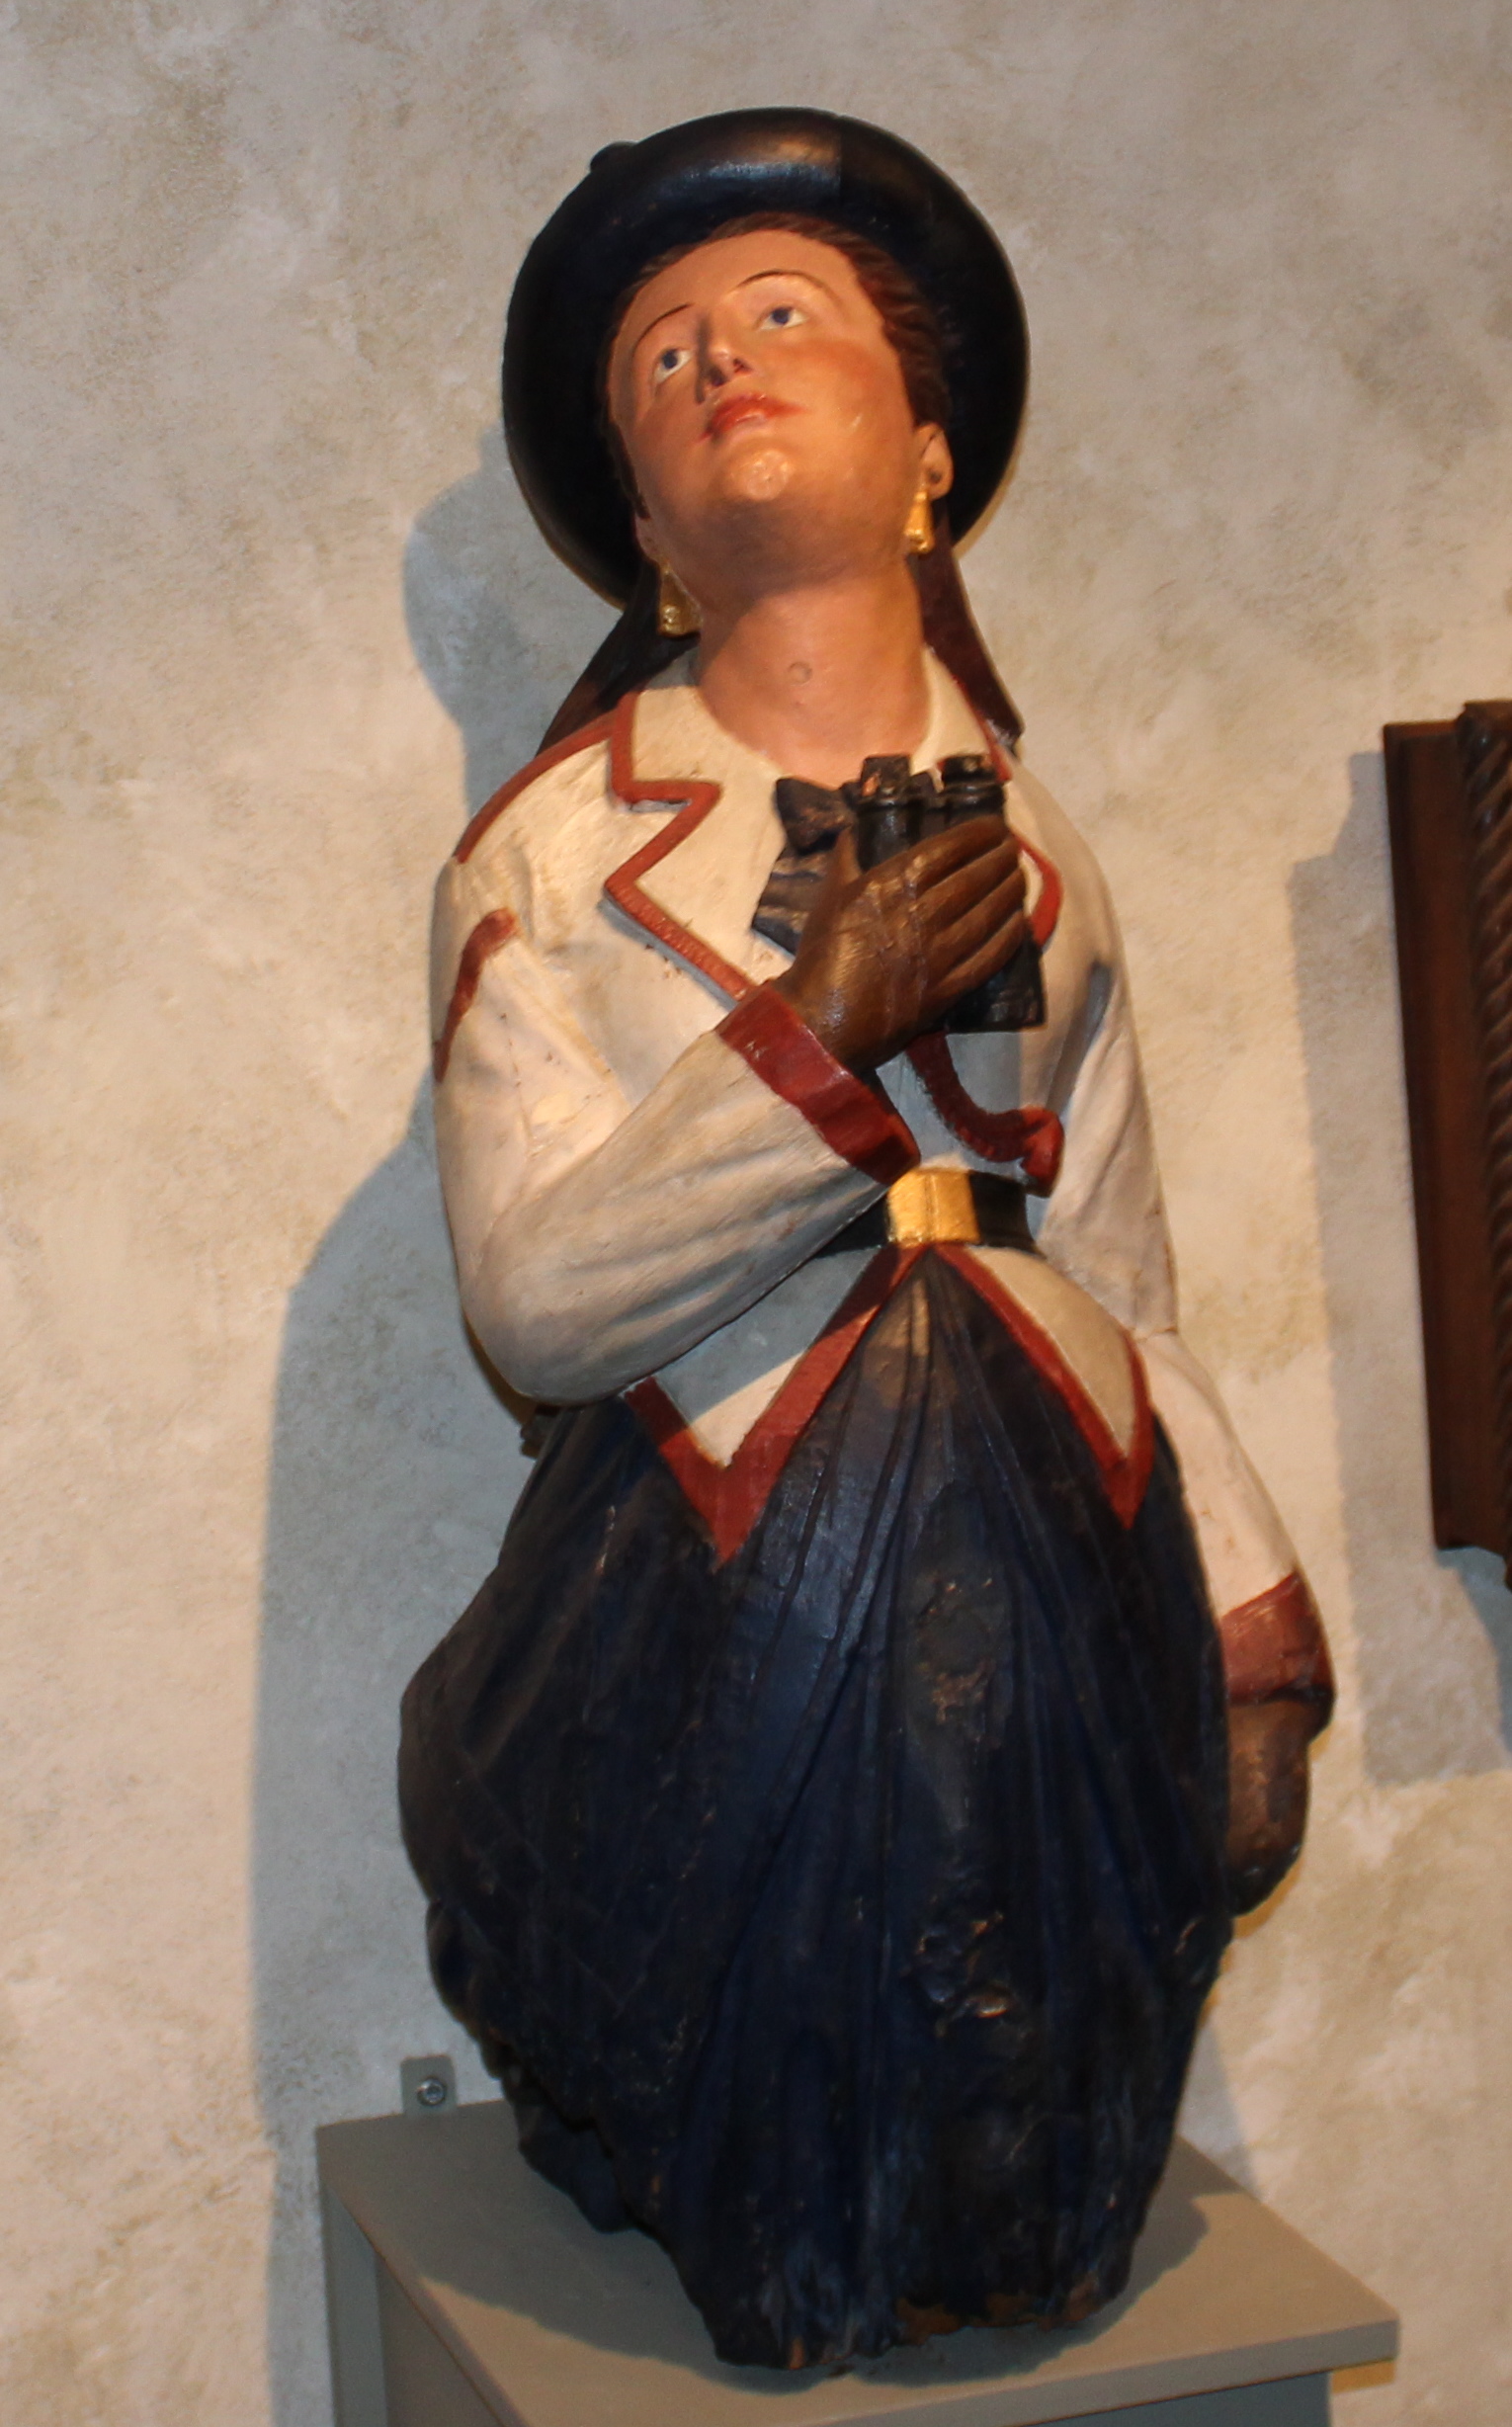
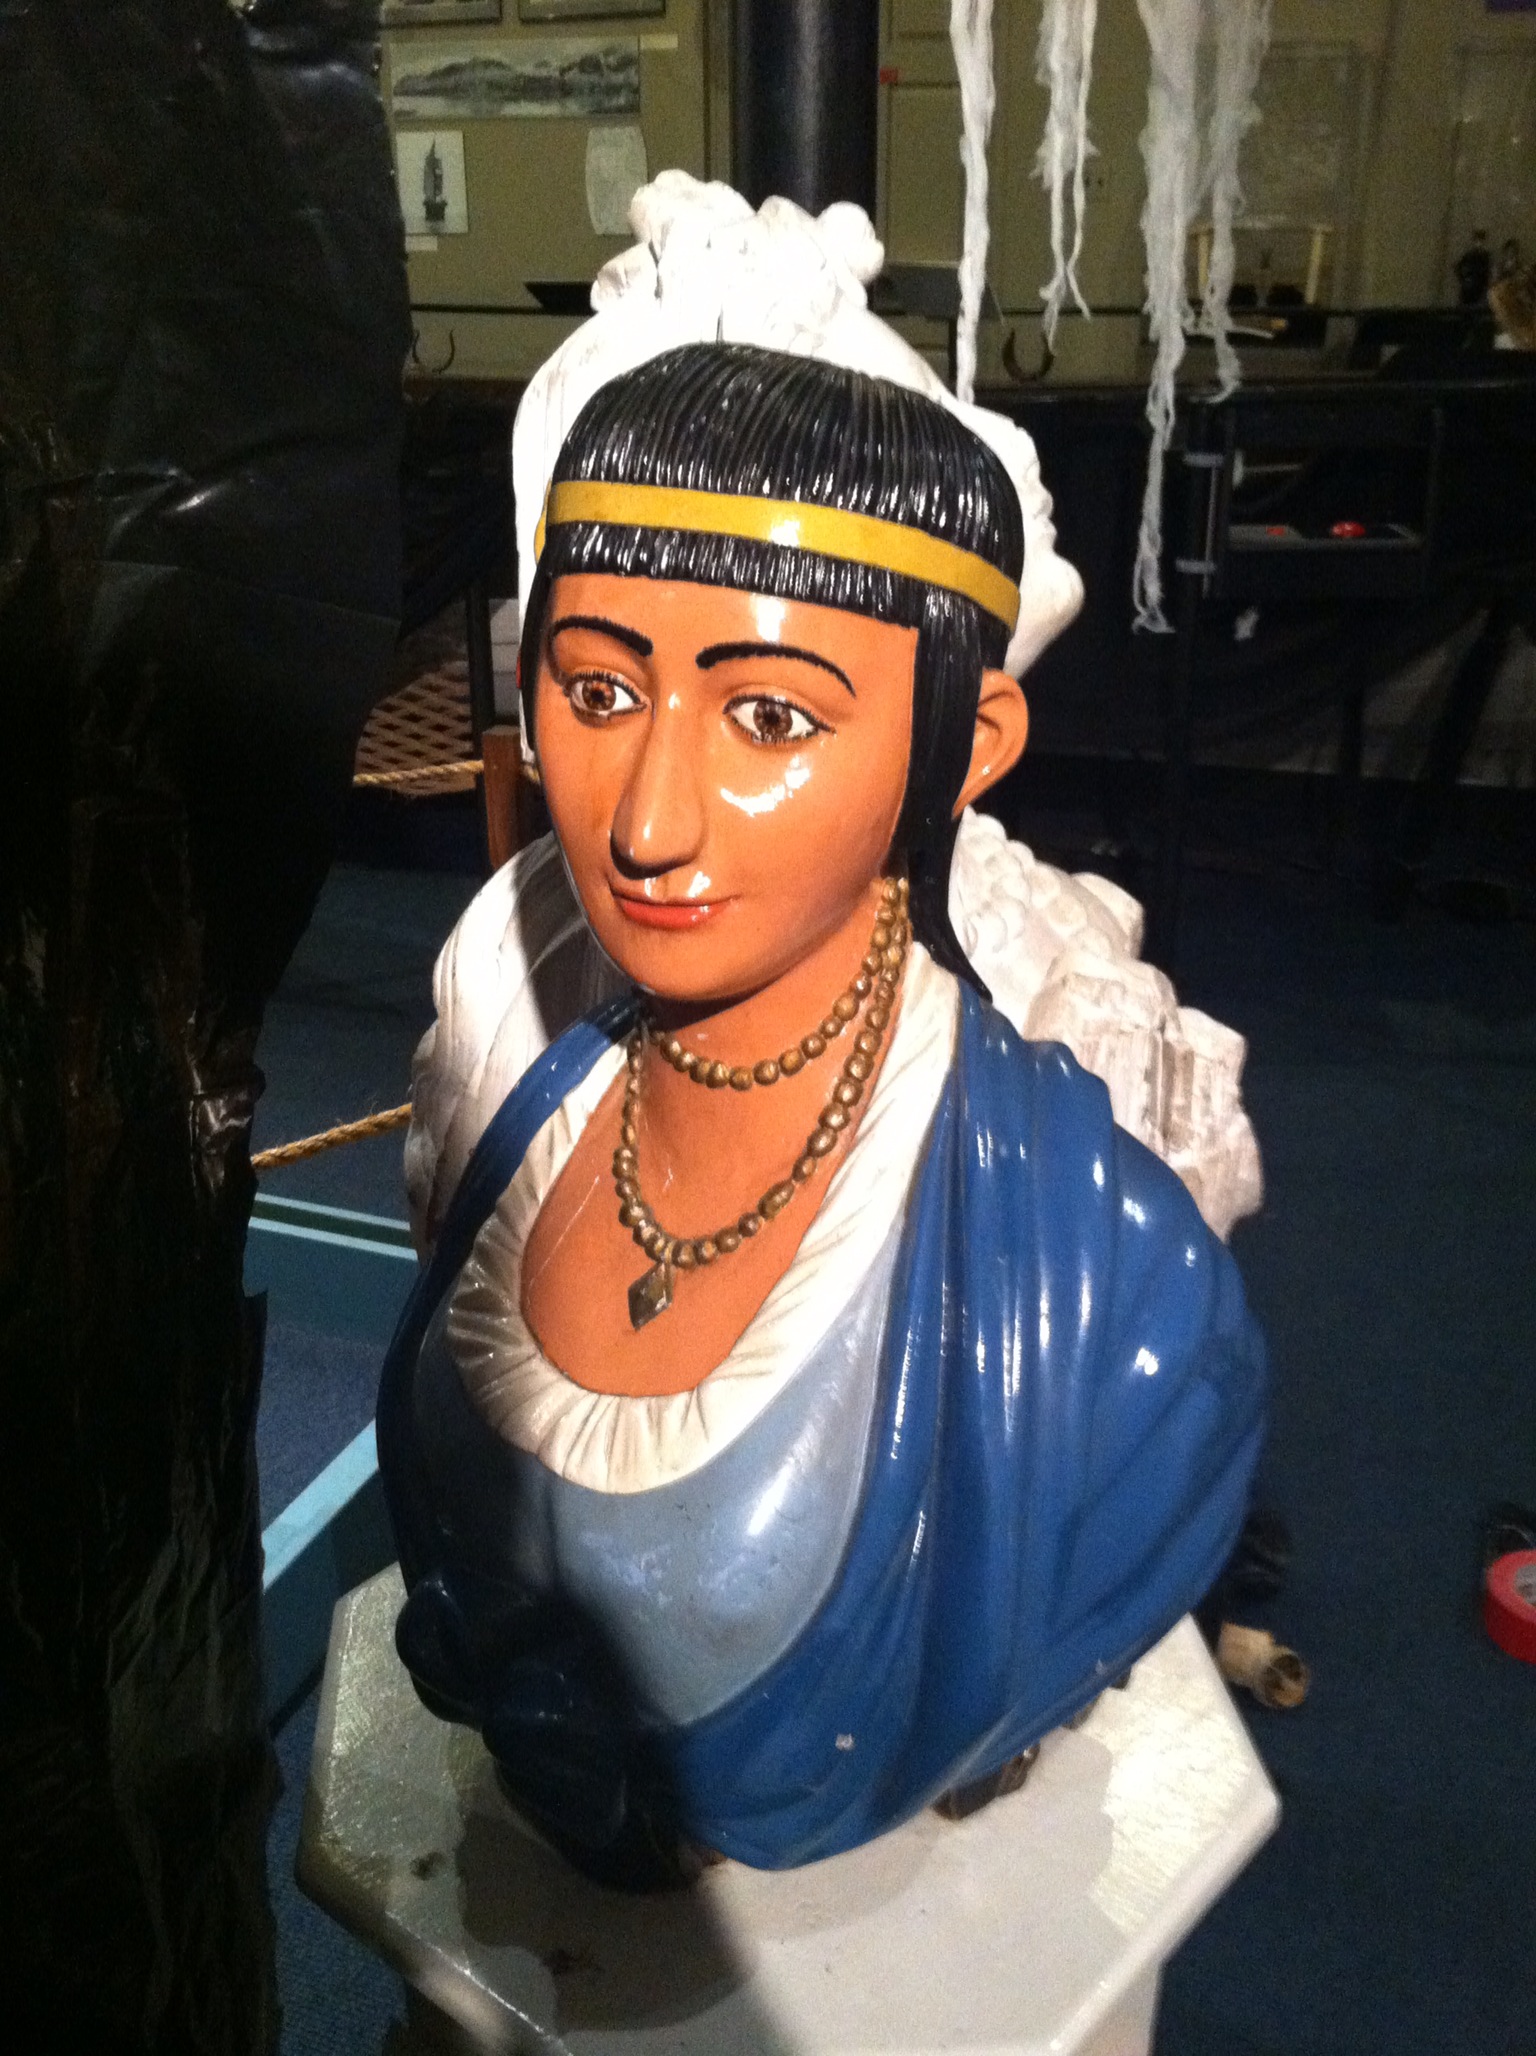
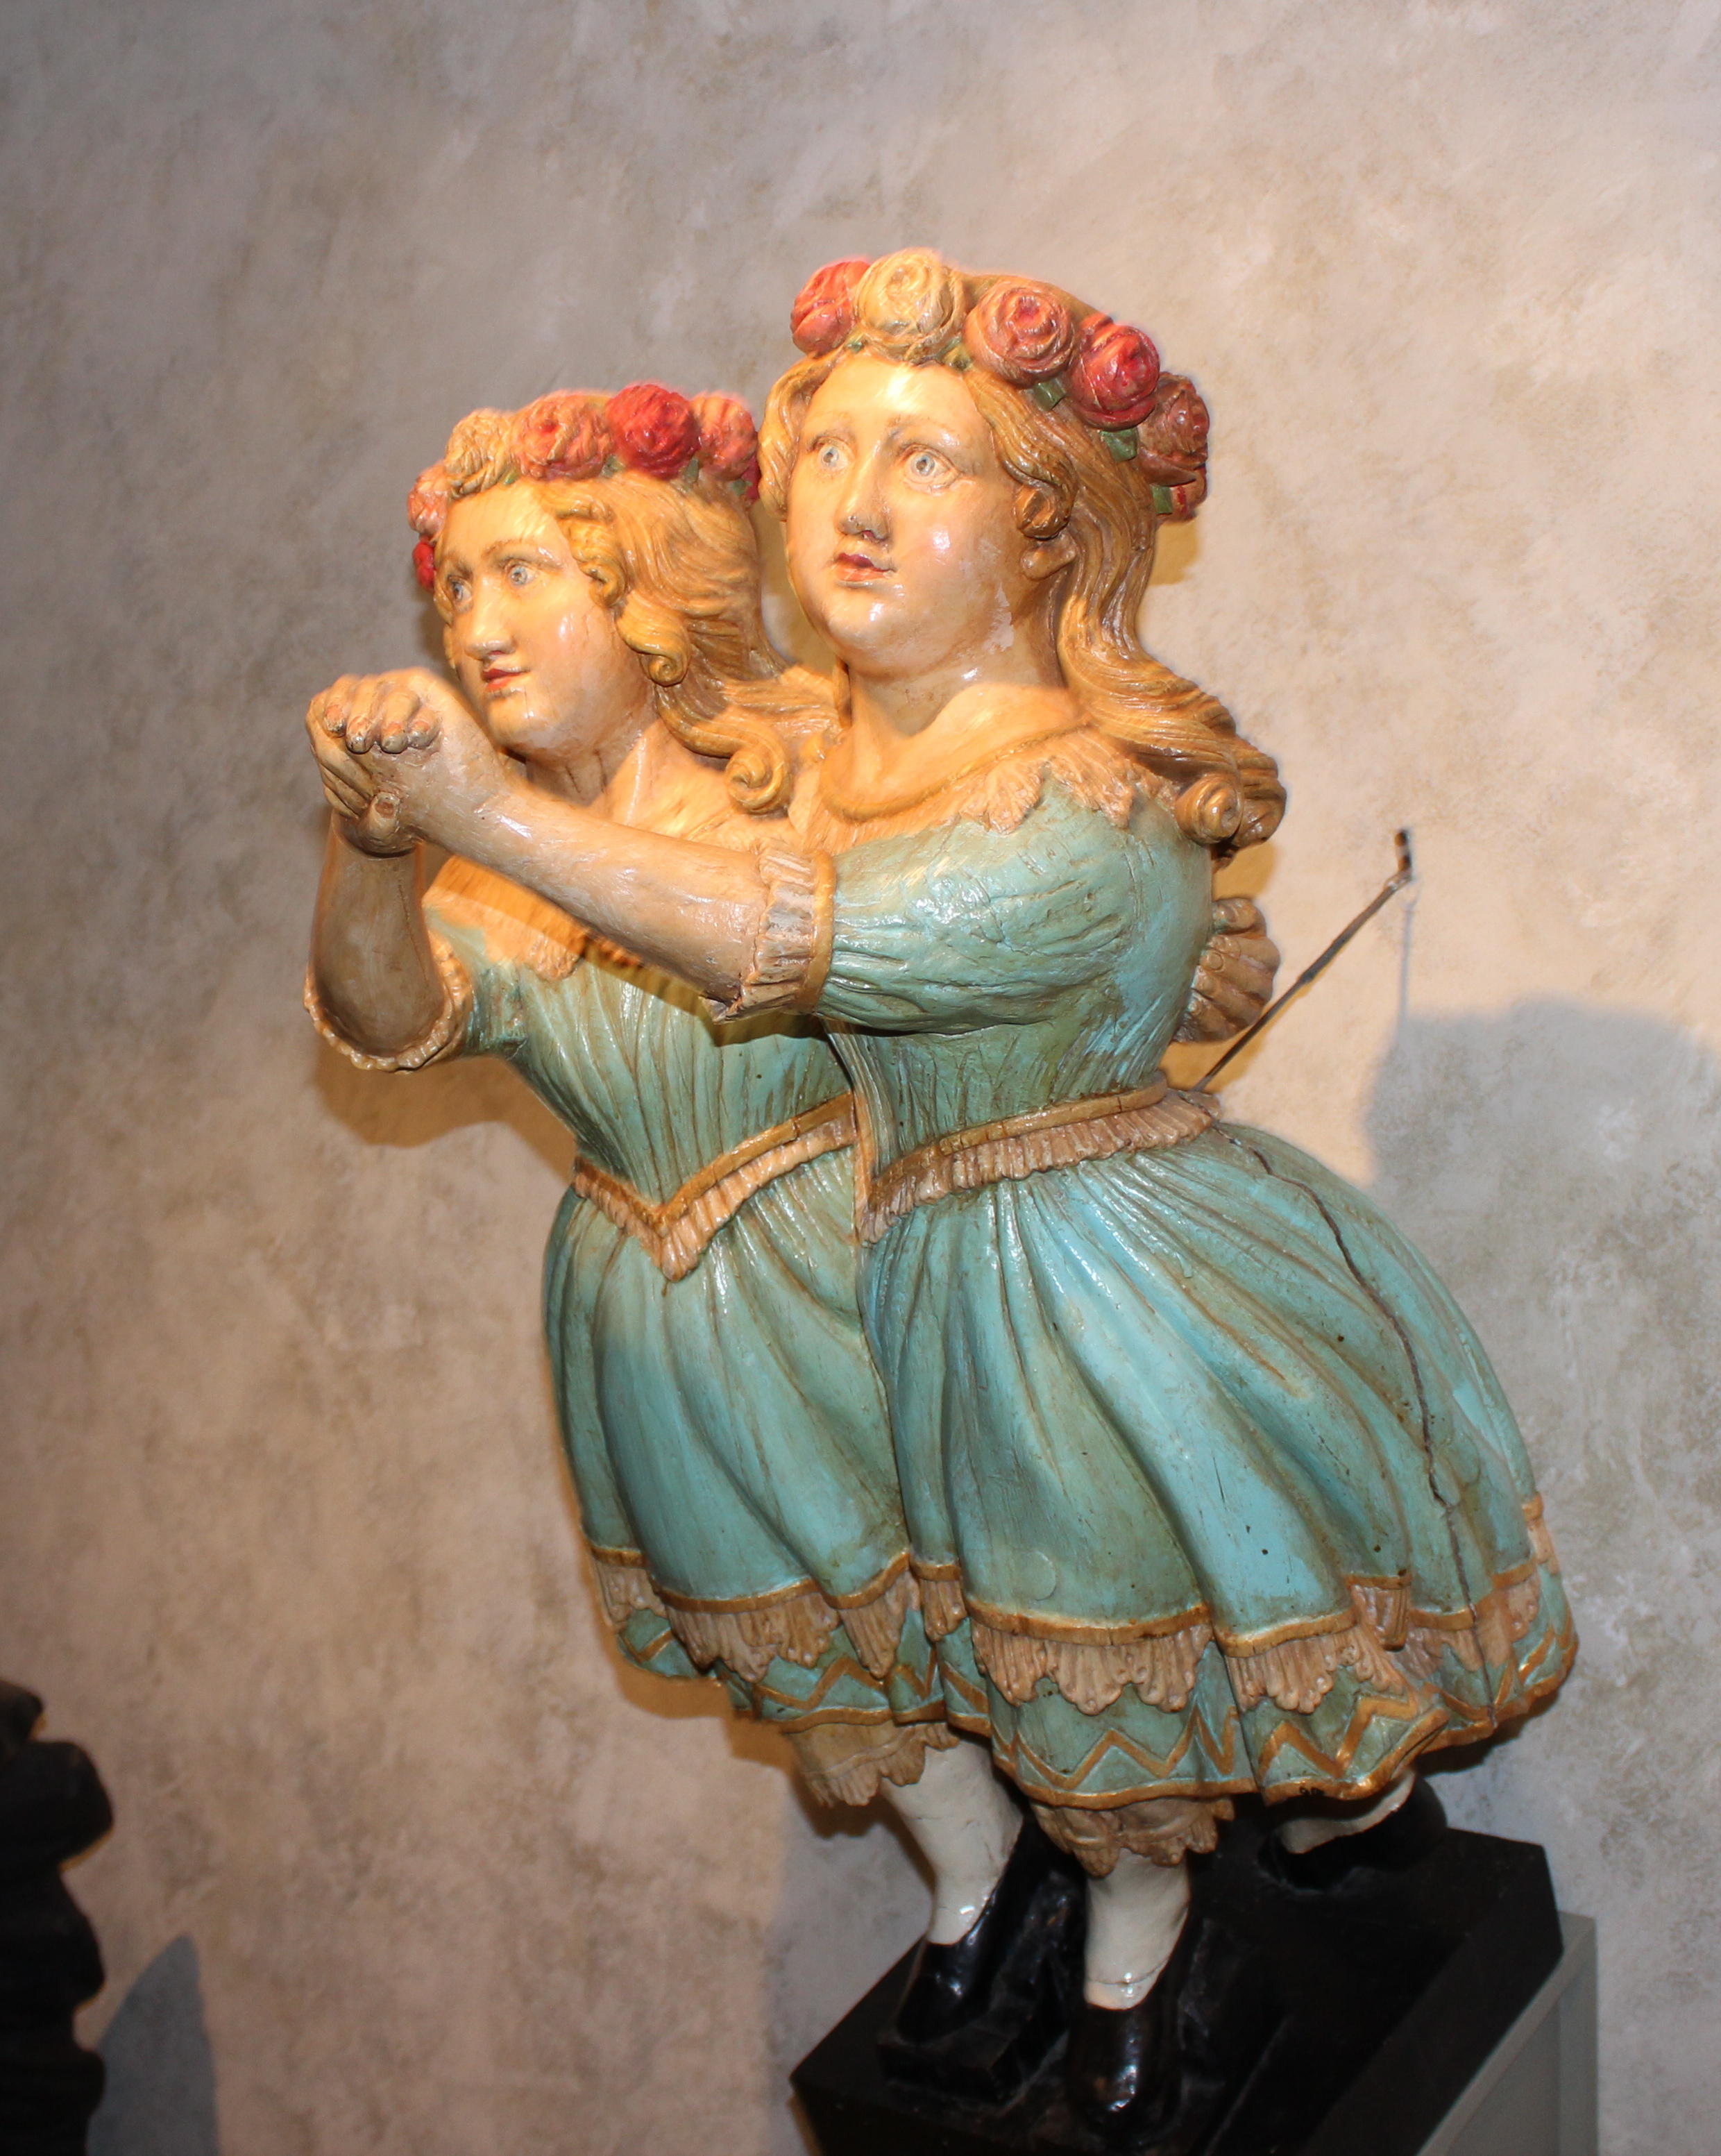
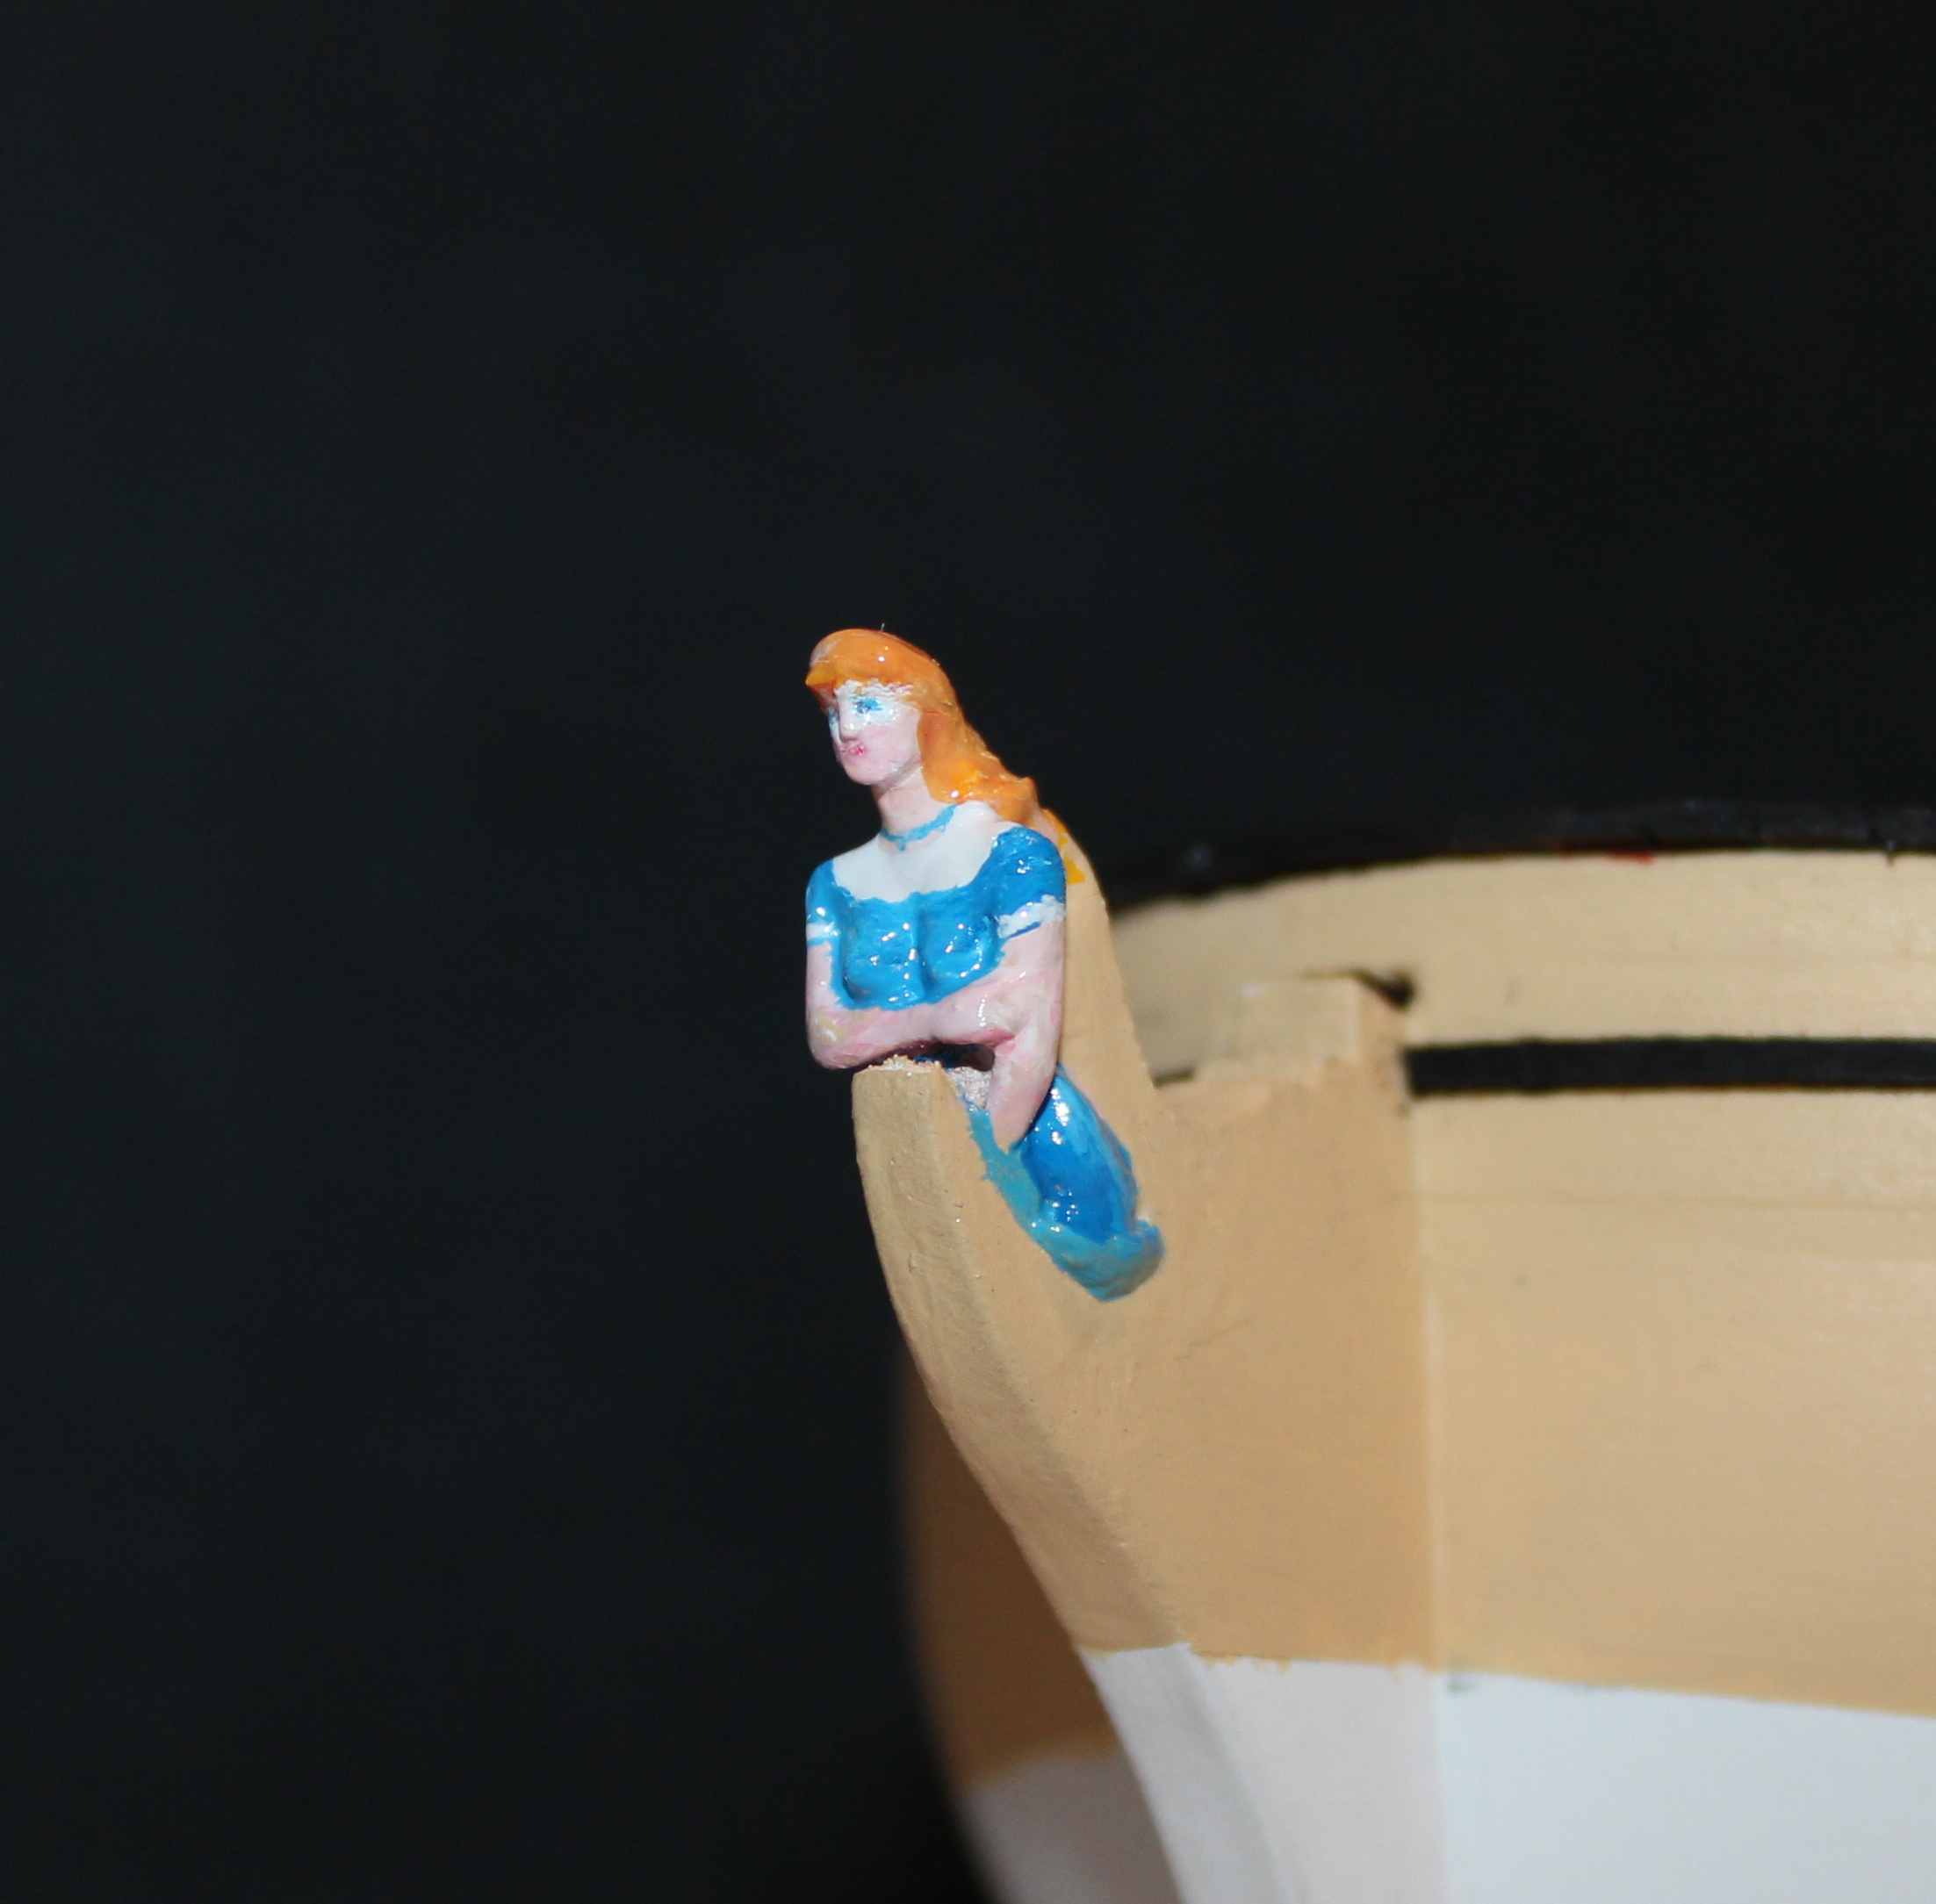
As a result, I am modifying the figurehead. The picture below shows the clothed version. If some buyer wants the more lurid version, I will say that I just don’t think it’s right.
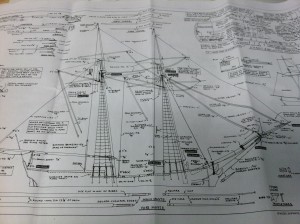
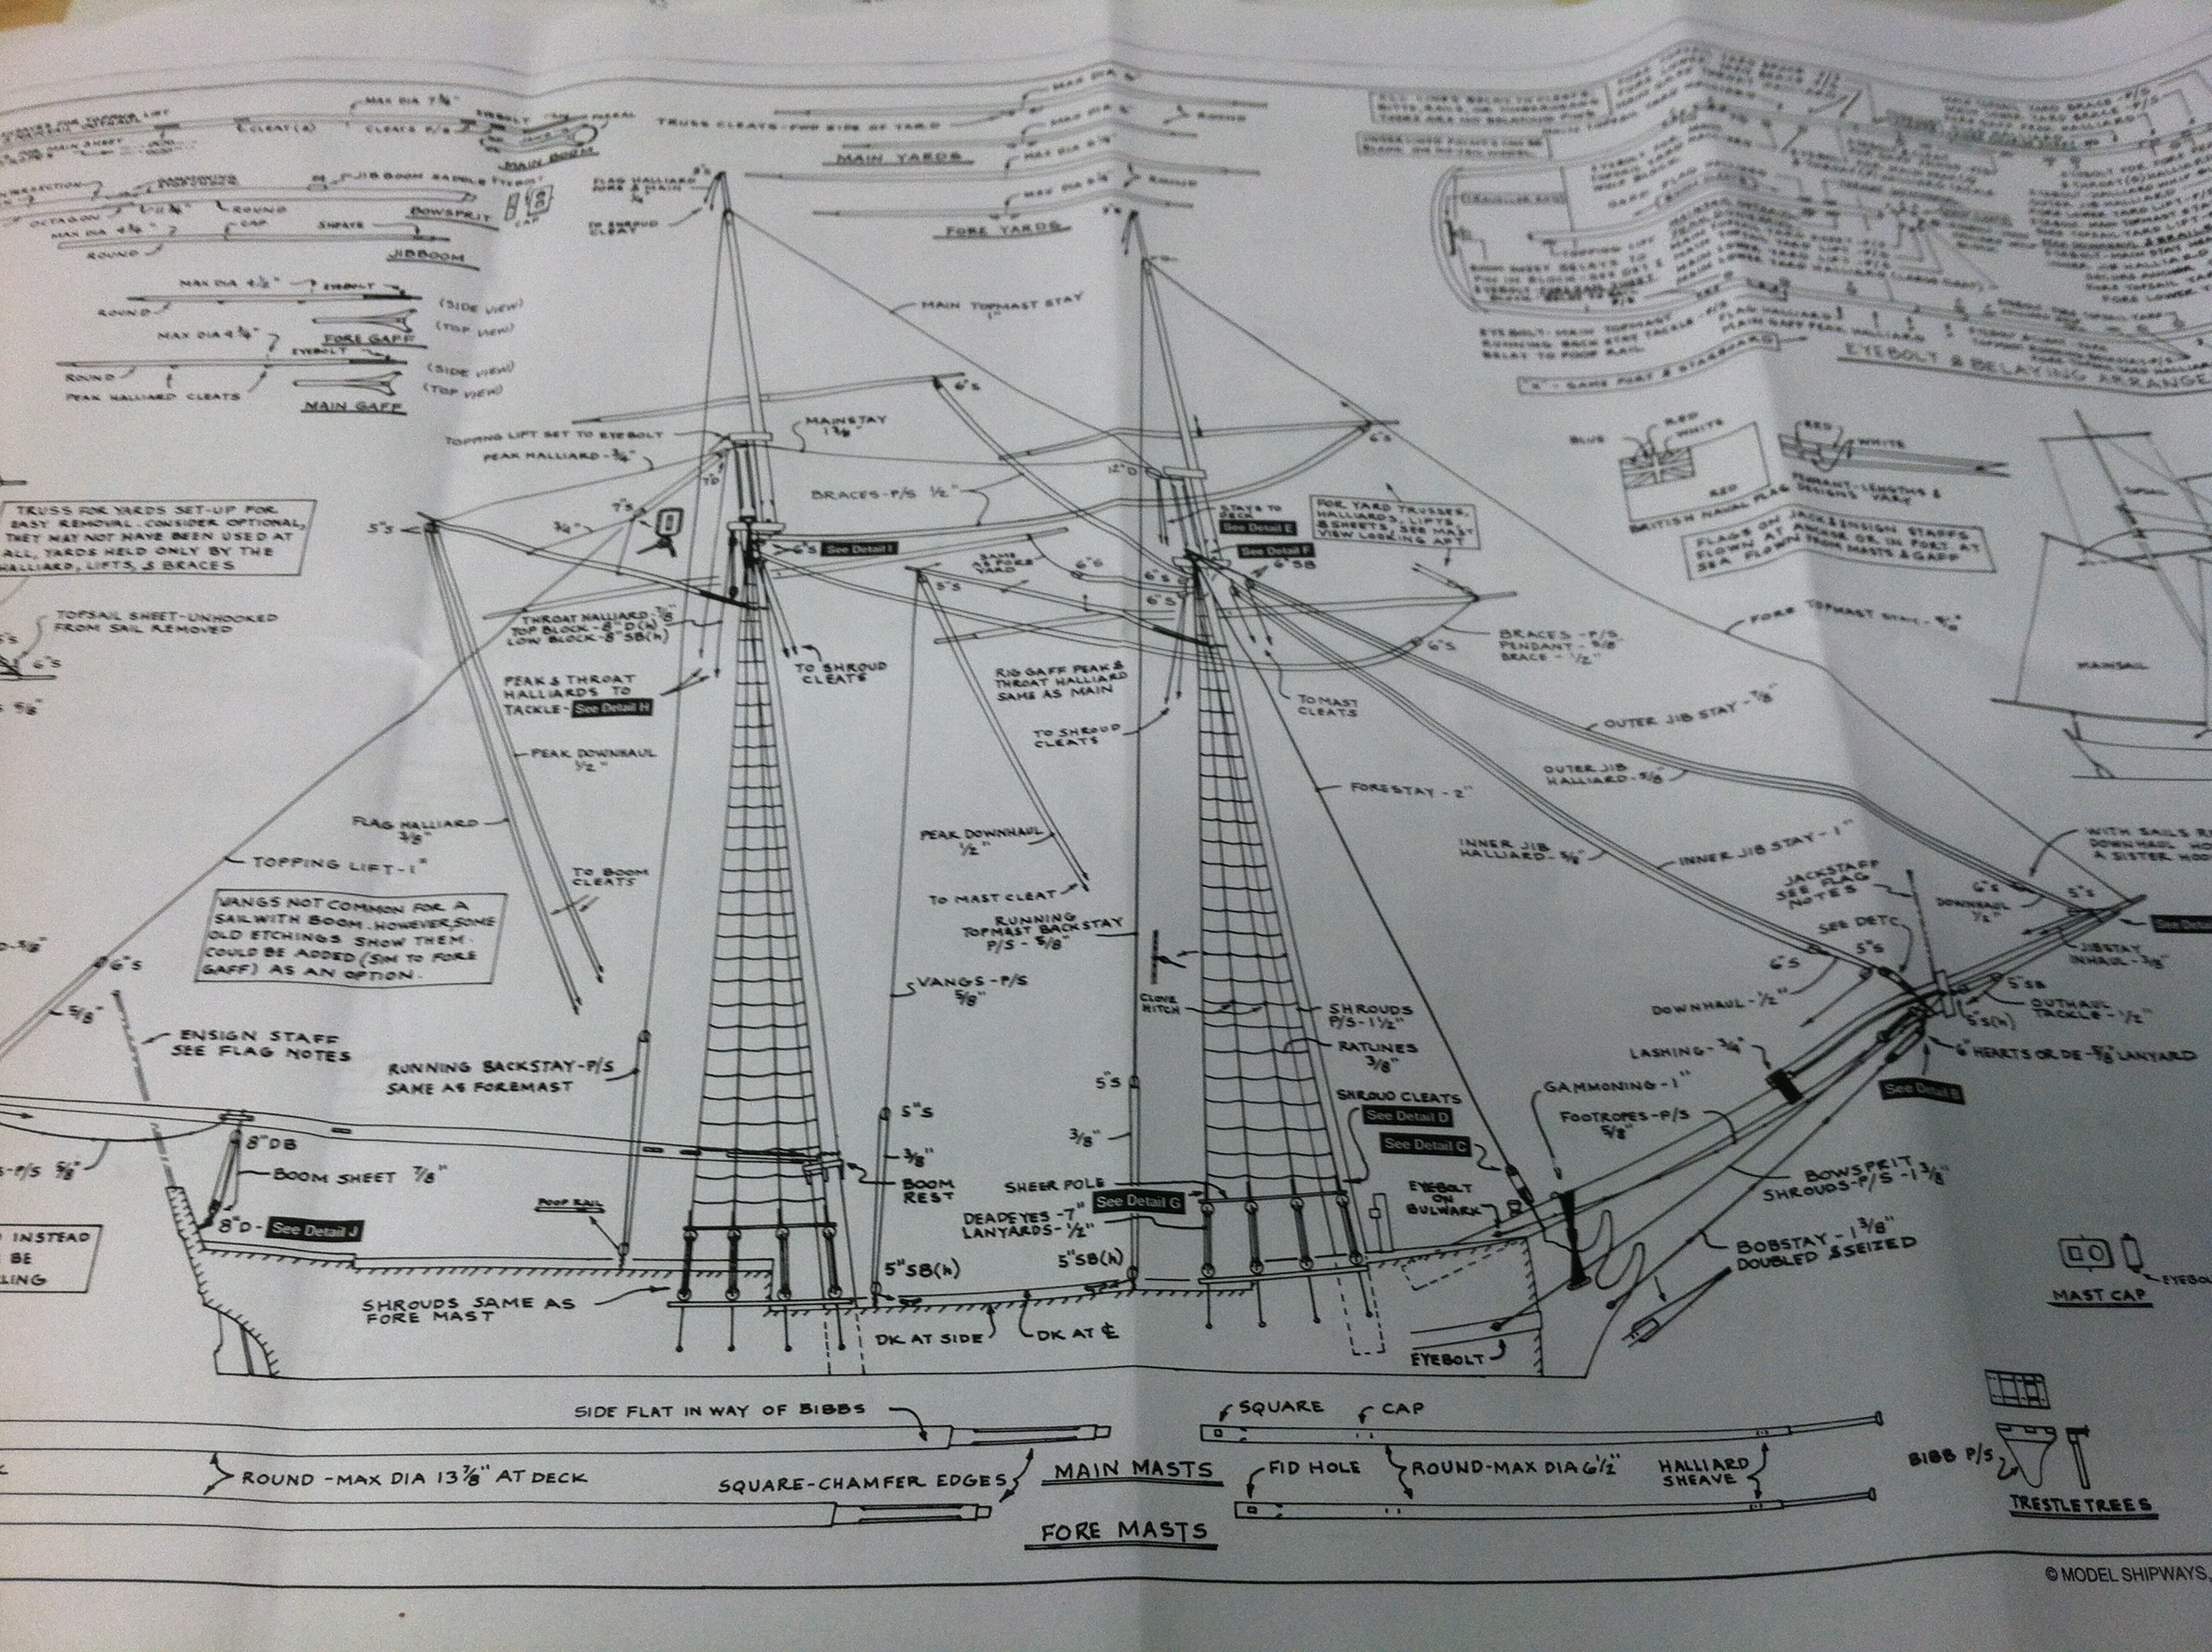
There are contemporary paintings of Colonial period schooners, plans that the British made of the Sultana when they bought it, and a replica that sails the Chesapeake Bay. As a result, we have several references to help us re-create how the Sultana may have appeared.
As the next step, I’ll add some planks that go on the back and sides of the hull. The planks have to be cut to fit the shape of the ship, then they have to be steamed to fit its contours. This is a small model, only 17″ long and 15″ tall, so I am working with wood that will end up being only 1/8″, 1/16″, or 1/32″ wide.
November 7, 2013
 After a one-week break in Puerto Rico, where I didn’t see a single model, I am back on track with the Sultana. She’s acquiring that sweet look that painted models have when they’re properly scaled.
I love her colors; the black on the rails against the red highlights is striking, while the the sides of the hull will also ‘pop’ when I add the wales.
I am now concentrating on one model, since it is difficult to give this much attention to two models simultaneously. This is the point at which I can envision the final ship, and things move much more quickly for me.
October 26, 2013
 As I often do, I have gotten caught up in the details, which is very time-consuming. That’s because a very fine model can easily be ruined by one single detail that is not sanded properly, out-of-scale, or otherwise overlooked. This means hours of re-carving the figurehead’s face, adding flowing hair, making and rejecting several versions of the deck furniture, and sanding, sanding, sanding.
I would say that my four-days in New England didn’t help to advance the progress on the Sultana, but a visit to Stuart Frank of the New Bedford Whaling Museum gave me insights that I know will improve every model I build from this point forward.
October 13, 2013
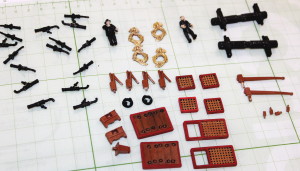
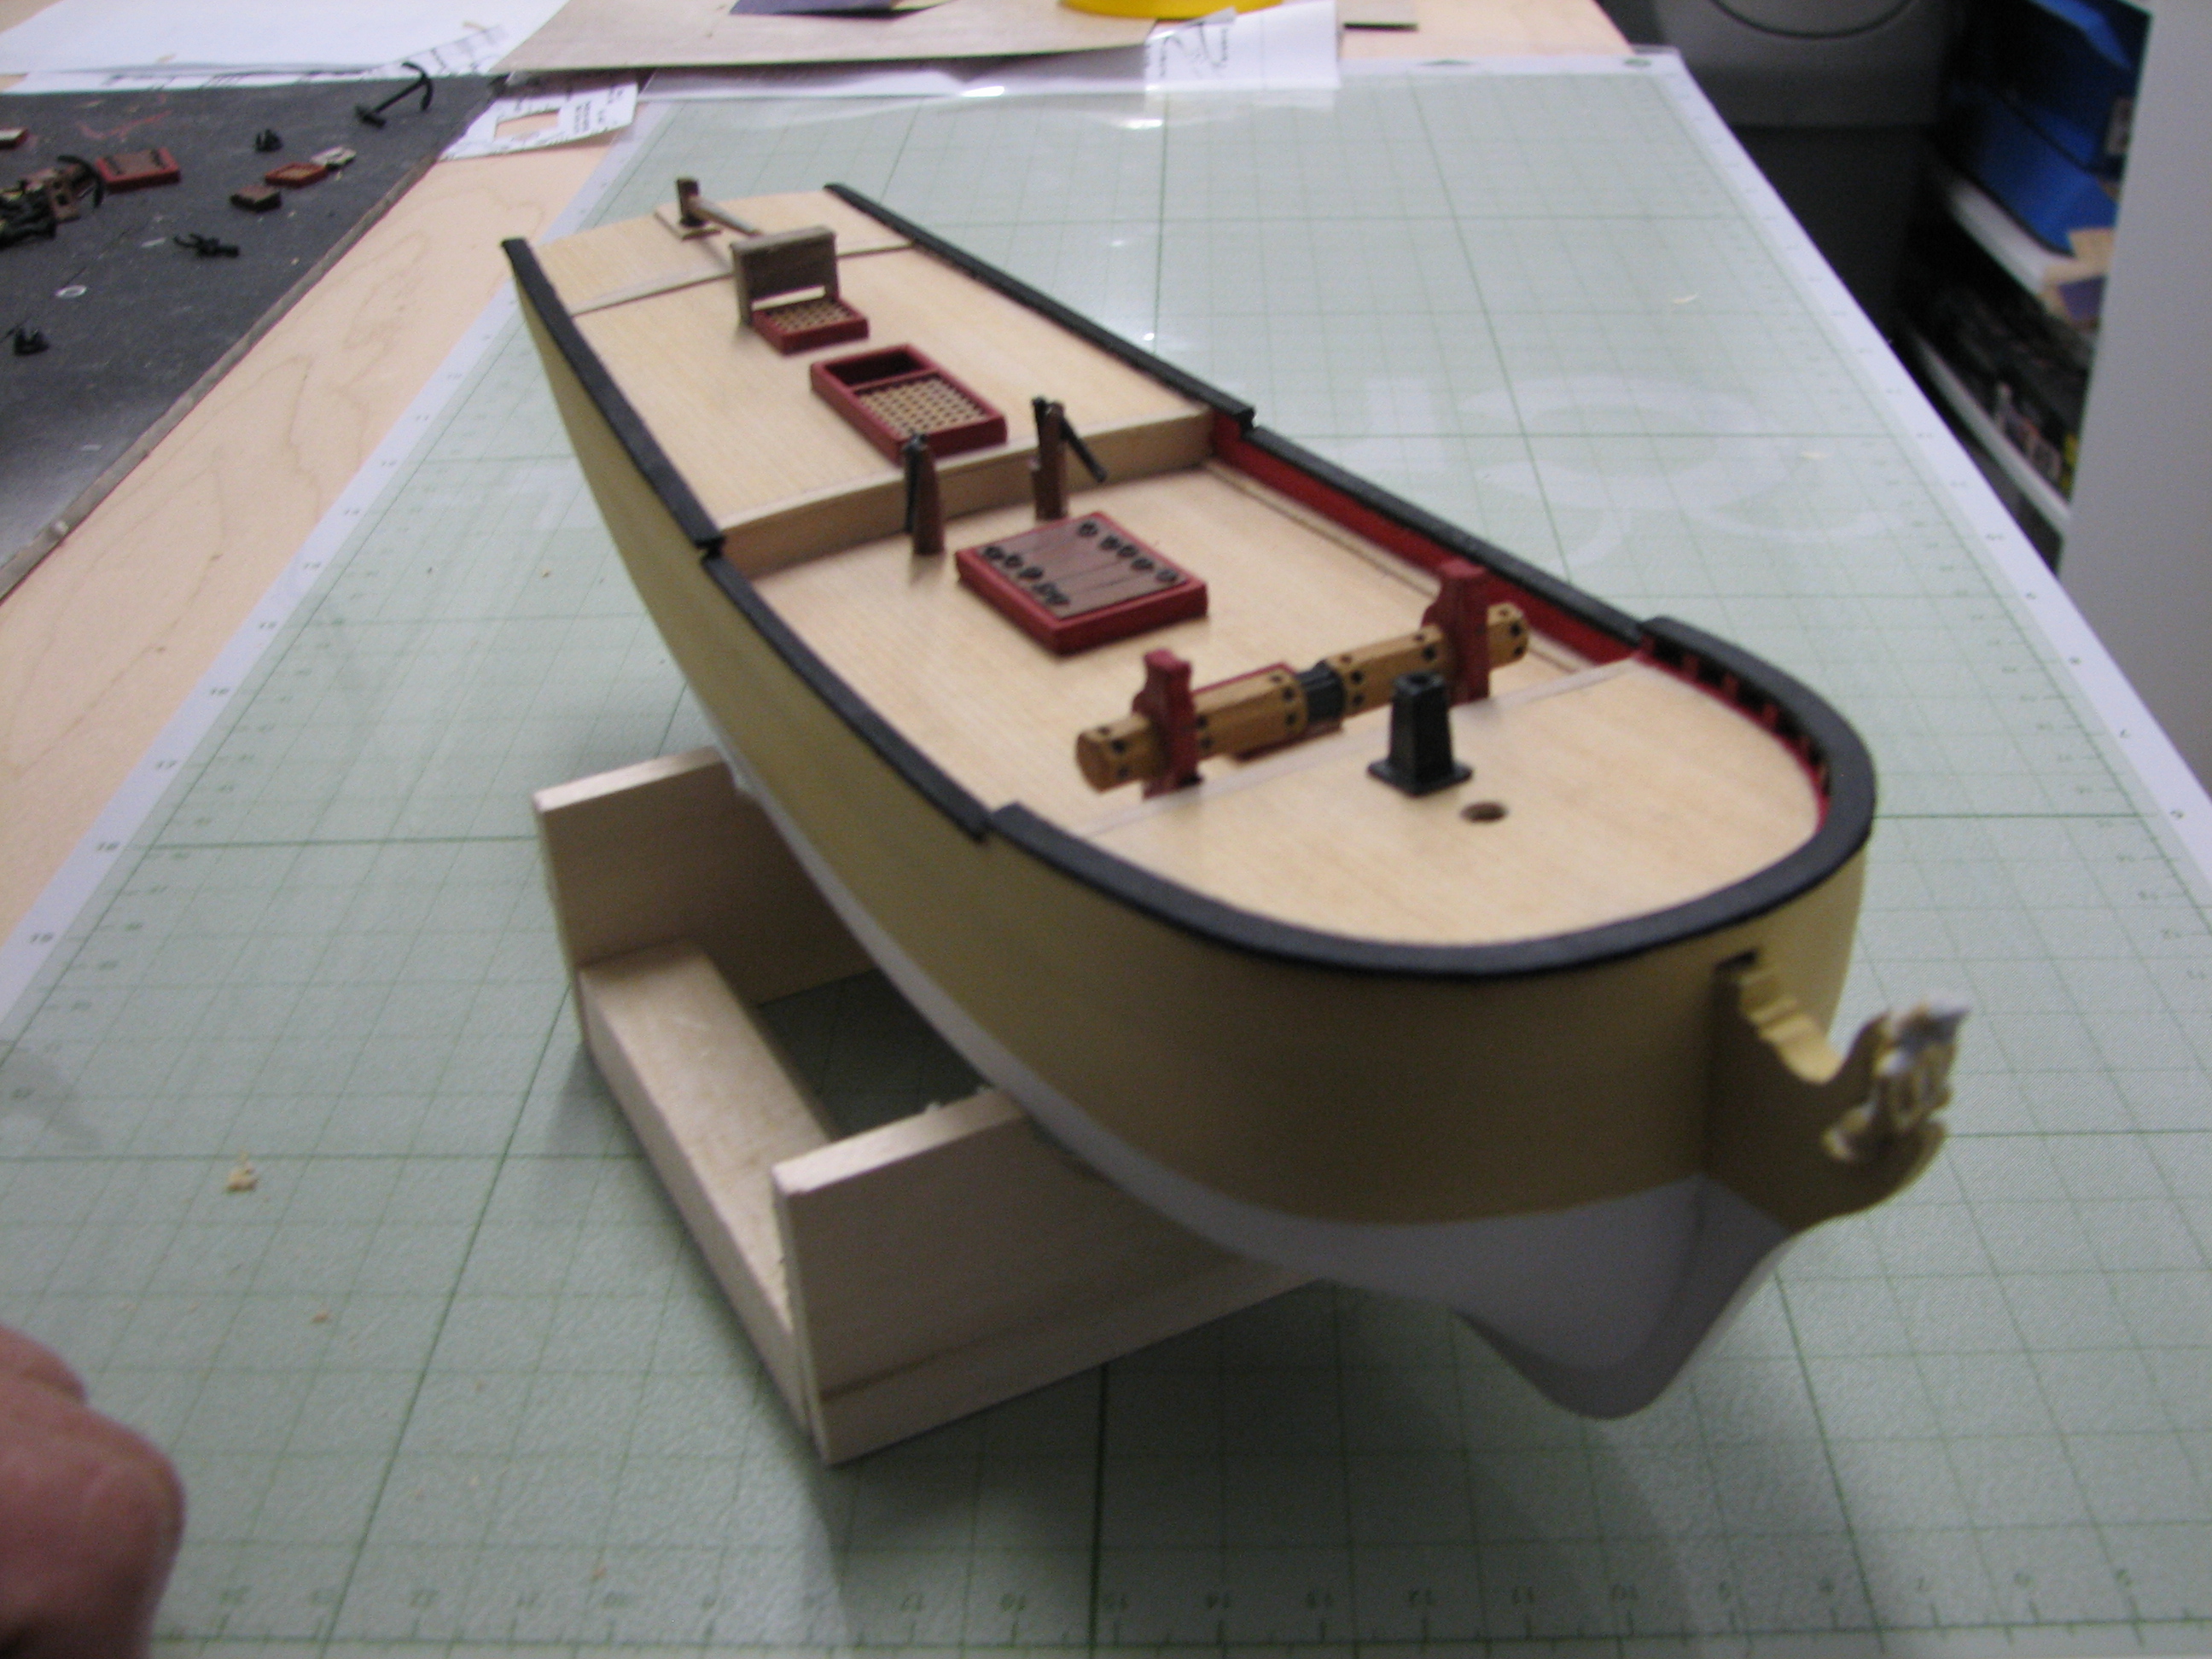
I have finished sanding and painting the bottoms of the Sultana hulls. The next step is to add the decks and deck fittings. The deck fittings have been painted and are ready to go.
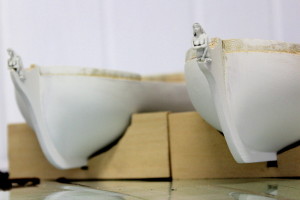
This is where I may need to re-do some items, because I know that the scale from the plans is not correct on some of these fittings. The figureheads have already been attached and will also be painted once I have attached the rails.
September 23, 2013
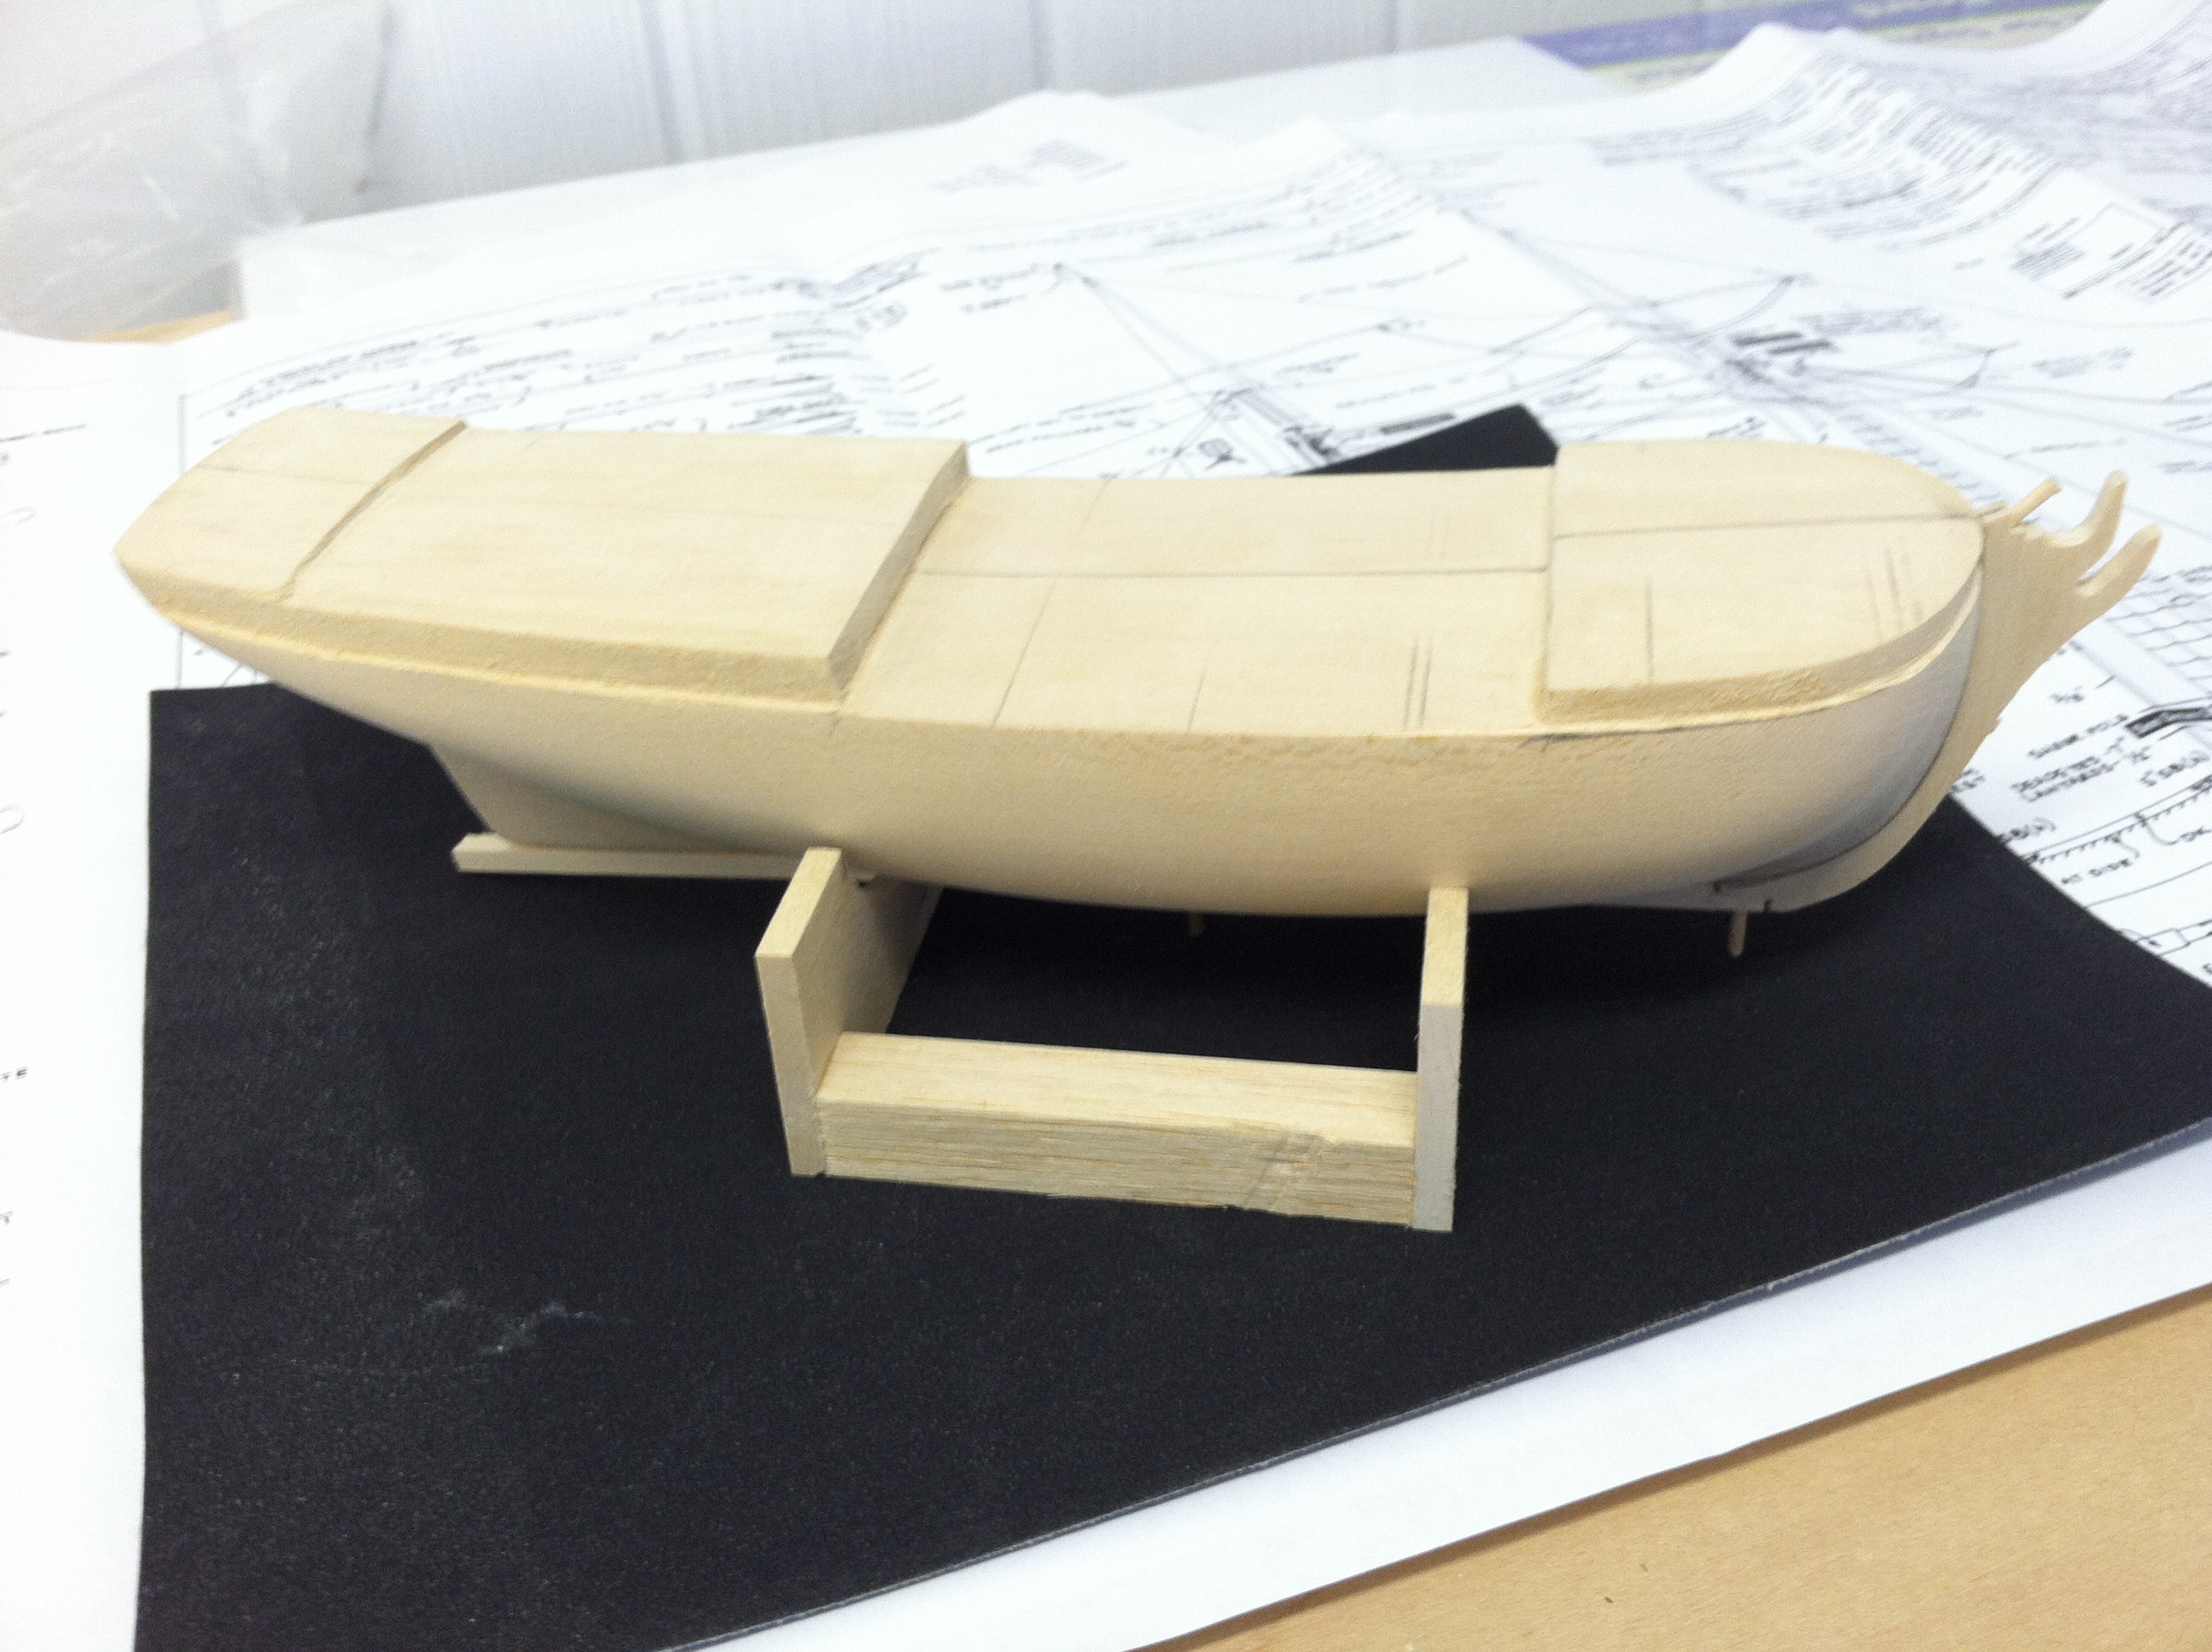
At this stage, I have finished sanding the hulls and am applying the keels, stems, and stern posts.
The Sultana plans are very straightforward. I will do some modification, since I am familiar enough with the design to add details that were not included in the plans.